Friday, March 19, 2010

Farewell Grandpa Ed

grandpa collage

A few posts back I wrote about my Grandpa Ed and the quilt my sister and I were making for him. This week we lost him. I have cried a lot this week—in sorrow at my loss, in happiness at his relief, and in gratitude for the prayers that were answered. For months now I (along with my family) have been praying that Grandpa Ed would be allowed to die soon and end his suffering. But we had a tall order to this prayer and we were very specific. We asked that he get to go soon, that he not die in a moment of suffering, and that he could go quietly in his sleep. The Lord is indeed merciful because that’s exactly how he went. The day after he died I was  reading in my scriptures and read this verse:

 “I, Nephi, will show unto you that the tender mercies of the Lord are over all those whom he hath chosen, because of their faith, to make them mighty even unto the power of deliverance.”

 As I read that verse I knew instantly that God had heard our prayers and had indeed delivered Grandpa Ed. I don’t usually blog about such personal spiritual feelings, but I felt like I needed to write these thoughts down. My friend Laurie always says that you don’t blog about the really good and you don’t blog about the really bad. Great rule, don’t you think? This blog post is definitely one or the either. Not sure which, probably a little of both.

So farewell to my Grandpa Ed. I hope there are oranges, grapefruits, and especially avocados in heaven because nobody had a ranch quite like his. I cherished those 25 lbs of avocados he’d give me as a Christmas gift when I’d come home at the holidays. He was always generous with me and my siblings and honestly I don’t think he ever said an unkind word to me. As I held his hand the last time I saw him I told him as such. I loved him dearly.

Saturday, March 13, 2010

Polenta with Sausage and Mushrooms

polenta with mushroom and sausage 013 copy EEE-gads. I don’t think I have written here about just corn gritshow much I like love adore polenta. According to my culinary boyfriend, Mark Bittman,  polenta is “more flavorful than either pasta or mashed potatoes”. You said it Mark! So yesterday I took his advice and made polenta—the rebellious way—Mark’s way.  I felt so dangerous the whole time! You can read about it in Mark’s column for The New York Times. It was easy peasy. I’ll never make polenta the other way again—stirring, stirring, and more stirring.

I always use Bob’s Red Mill polenta grits as I like their flavor best although I do use Quaker  Cornmeal when desperate. Regular cornmeal is very finely ground and cooks fast. Bob’s Red Mill takes about 30 minutes to cook.

Mark Bittman recommends sausage as his favorite topping for polenta and since I adore him his recipes I knew I had to try to it too. Here’s what I did for my sausage/mushroom ragu.  Goodness, I ate 2 servings last night and then quickly finished off the leftovers for lunch today. I think I need to make it again. Tonight. Ok maybe not tonight, I hate it when I over make my favorite foods and then quickly tire of them. I like to serve polenta for company. Do it.  Your guest will think you’re super fancy.

Sausage Mushroom Ragu

1/2 lb sweet Italian sausage (I get mine at Sunflower Market in Orem)

1 80z. package baby Bella mushrooms, sliced

1 clove garlic, minced

Brown the sausage in a skillet until almost done. Remove from pan and add sliced mushrooms and 1 T. olive oil. Sauté mushrooms about 10 minutes, stir sausage back in and finish cooking. Add garlic and cook 1 minute more.  Spoon over hot polenta and serve with freshly grated parmesan. Yield 5 servings

Friday, March 12, 2010

Almost there….almost there….

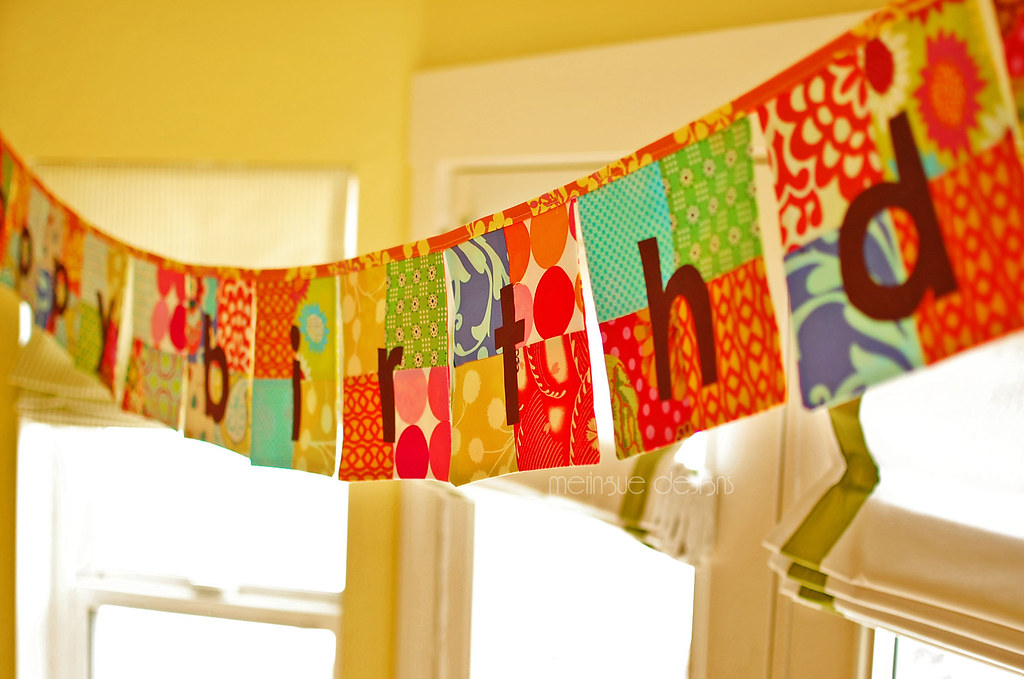
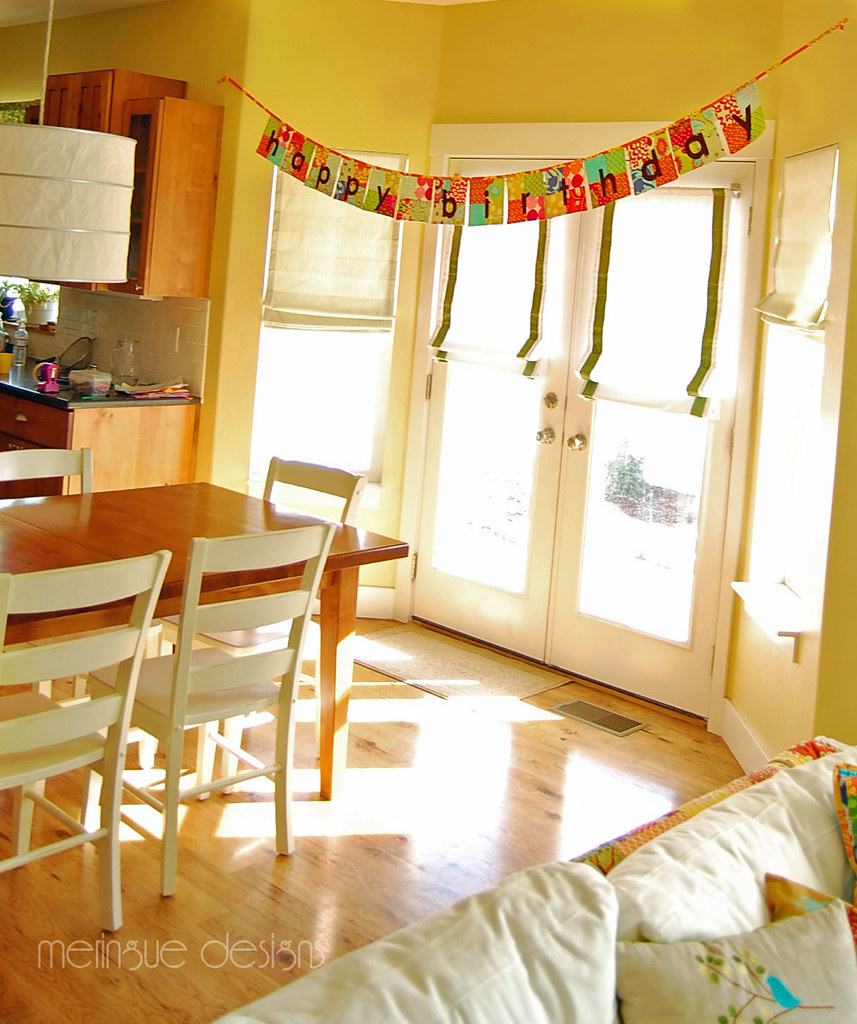
It’s sunny, it’s 40 degrees, and I am getting ready for spring! Unfortunately this isn’t my banner. It’s for a client, but I’m making me one soon. I hate being left out. Looks how cute this matches my picture frames? Gimme…gimme…DSC_0607 edit
DSC_0593 copy

The Brownie King

My 12-yr old son loves brownies.  I mean, he really loves brownies. He would marry them if he could, that’s how much he loves them. About a month ago I decided it was time for this boy to learn to make brownies. After all, he is constantly begging me to make him brownies, and really I am just lazy he is 12 and needs to learn to cook more.  And since there really are no great brownie mixes out there, (oh stop, there isn’t) and seeing as it is just as fast to make homemade brownies, I taught Nathan how to make Mark Bittman’s brownies from his book How to Cook Everything. (Have I ever told you that I have a culinary crush on Mark Bittman? Well, I do.)

Fast forward a month later, and Nathan has mastered this recipe—melting chocolate and butter, stirring the dry ingredients together, and adding just a pinch of salt. “Do they really mean a pinch mom?” He has made these brownies at least 4 times, including this week for refreshments for a Boy Scout Court of Honor. 

Nathan: “Mom, I need to bring a dessert to the court of honor.”

Me: “Good thing you know how to make brownies now, isn’t it?”  He was happy to do so, he’s just concentratin’ real hard like in this photo.

DSC_0453

Brownies (by Mark Bittman from How to Cook Everything)

2 oz unsweetened chocolate, roughly chopped

1 stick butter

1 cup sugar

2 eggs

1/2 cup flour

pinch of salt

1/2 tsp vanilla

Preheat the oven to 350 degrees. Grease an 8-inch square baking pan. Combine the chocolate and butter in a small saucepan and melt over very low heat. Transfer to a bown and stir in the sugar. Then beat in the eggs, one at a time. Gently stir in the flour, salt, and vanilla. Pour and scrape into pan at bake 20-25 minutes. Please don’t overbake, you want them just slightly gooey.

And for his birthday, Nathan wanted brownies again. But you gotta have fancy brownies for birthdays so I called my SIL Ilene and asked her what to do. She said to try Barefoot Contessa’s Brownie Tart. Oh, yea, huge hit. I mean, HUGE hit. And just as easy as the aforementioned recipe. Only fancy. Because round tart pans mean fancy and French. So take your pick!

DSC_0552 DSC_0556

Friday, March 05, 2010

Ah, Turquoise

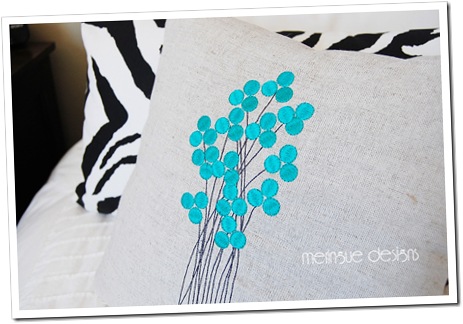
I got some great new fabrics in—Nicey Jane by Heather Bailey. They are springy, lovely, and dominated by turquoise. Well, at least the ones I purchased have lots of turquoise. New cottons make me giddy and happy to enter my sewing room again. Which is good because we were just hit with another horrible snow storm. Adding my bird design didn’t hurt either, you think?
 turquoise bird pillow copy
turquoise bird pillow4

Worse than Water Boarding

The other day I noticed my 6-yr old making some peculiar devices for her stuffed animals. She was very focused and very meticulous about her project. I asked her what she was making and she said she was making hats for her toys out of Magnetix. How sweet I thought! Once she was done, I was called to her room to behold her creations. and here is what I saw:

curious george

Hats my foot! Hallie had figured out a brilliant way to make all her animals tell her their deepest darkest secrets. Each confessed, particularly the innocent looking white dog, that it was they who messed up her room each day while she was at school—throwing clothes everywhere and tossing candy wrappers negligently among the bed sheets. I am no scientist, but I’m guessing the magnetic field produced from the Magnetix create a sort of reverse osmosis where the truth is literally sucked from their polyester stuffed brains. Move over Dick  Cheney, there’s a new girl in town and she doesn’t need water, nor a board. That’s my girl!

curious george and others

Friday, February 26, 2010

Four-Patch Birthday Banner

four patch banner 014 copy
I’ve been wanting to make a new birthday banner for family. And while I love the ones I sell in my etsy shop, I have literally made hundreds of them in the same color scheme so I’m a bit tired of seeing the same fabrics day in and day out. So I decided to make a totally unique one with four-inch squares of fabric. If you too wanna be like me (or at least like my banner) cut 56 4” squares of fabric. (Happy Birthday has 14 letters but I made a ‘blank’ patch to go in the middle.)
four patch banner 002
Then you gotta pair ‘em up and sew 28 pairs together so they look like this:
four patch banner 005
Then you gotta pair ‘em up one more time (oh, come on, chain piece them and they’ll go real quick like) and soon you’ll have 14 squares approximately 7 1/4”
Back them, make some rope, fuse the letters, and you’re all done! Just in time for my son’s birthday Monday! And for all our family birthdays. Phew!
(If you need the pattern because this blew your mind, you can find it in my etsy shop.)

four patch banner 021

Friday, February 19, 2010

Homemade Bread

We’re in the dog days of winter here in Utah. It’s snowing as I write this which means for at least one more day I will not see any sunshine. (*wipes proverbial tears*) It’s depressing. Don’t get me wrong, I’m not the kind of depressed person who stays in bed all day with PJs and bad breath due to depression. Rather, my ‘winter blues’ lead me to avoid the already mundane laundry and bake instead. I guess I’m grasping for anything that will bring a little sunshine in my life. For me, that’s baking. So that’s what I did yesterday—I baked bread. It made me happy, it made my kids very happy, and it helped me get through at least one more horrific day of winter.

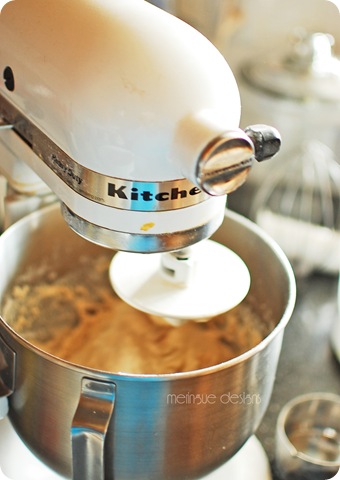
I usually make 2 loaves of bread at a time. If my mixer could handle more dough, I would make 4 or 5. But I’ll settle for two. Never settle for one loaf. Why bother? You gotta eat one loaf hot and save the other for dinner and breakfast. :)
baking bread 1

The best way to know when you’ve added enough flour is when the dough pulls away from the side of the mixer. I always use more than the recipe requires. I still scratch my head over that one. In other words, it no longer looks like the above picture, but looks like the one below.

baking bread 2


I then dump the dough into a well greased bowl and set it in my warm oven for 1 hour to rise. I warm my oven by heating it up for 2-3 minutes then turning it off. Why? Because even with the heater at 70 degrees my house is too cold to have the dough rise in just 1 hour. And I’m impatient.

baking bread 3

Ah, that’s better, now it’s been an hour and the dough is doubled. (Sorry the photo is yellowed. Too lazy to fix it.) Shape your dough into loaves, place in greased 9x5 bread pans, spray the dough, cover in plastic wrap, and place back in warm oven for 30 minutes. (You might have to heat the oven for 2-3 minutes again.)

baking bread 5


Wow, the magic of yeast never ceases to amaze me! Not bad for just 30 minutes puffifying in the oven, huh? Now you need to heat your oven to 350, remove the saran wrap, then put the bread back in the oven to bake for 40-50 minutes and until it reaches the magic number of 195 degrees.  Using a thermometer ensures your bread will be perfectly cooked without being too dry.

baking bread 6

baking bread 7

Remove from pans, slather with butter for a softer crust (I don’t like my crust crunchy for this kind of bread…..now for garlic bread, that’s a different story). Resist the urge to cut it up for at least 15 minutes. Distribute warm slices to the restless natives with butter, jam, cinnamon sugar, whatever. And give yourself 10 points in the Mother of the Year contest.

baking bread 8

SANDWICH BREAD (makes 1 loaf—double this as many times as your mixer will allow) (originally from cooksillustrated.com or American Classics)

3 1/2 cups all-purpose flour (I use half wheat flour…which removes some guilt in slathering later with butter)

2 tsp salt

1 cup milk or water, very warm but not hot

1/3 cup water, very warm but not hot

2 T melted butter

3 T honey

2 1/4 tsp instant yeast

INSTRUCTIONS

1. Mix flour and salt in bowl of standing mixer fitted with dough hook. Mix milk, water, butter, honey, and yeast in 1-quart Pyrex liquid measuring cup. Turn machine to low and slowly add liquid. When dough comes together, increase speed to medium (setting number 4 on a KitchenAid mixer) and mix until dough is smooth and satiny, stopping machine two or three times to scrape dough from hook if necessary, about 10 minutes. Turn dough onto lightly floured work surface; knead to form smooth, round ball, about 15 seconds.

3. Place dough in very lightly oiled bowl, rubbing dough around bowl to lightly coat. Cover bowl with plastic wrap; place in warm oven until dough doubles in size, 40 to 50 minutes.

4. Form dough into loaf by gently pressing the dough into a rectangle, one inch thick and no wider than the length of the loaf pan. Next, roll the dough firmly into a cylinder, pressing with your fingers to make sure the dough sticks to itself. Turn dough seam side up and pinch it closed. Place dough in greased 9-by-5-by-3-inch loaf pan and press gently so dough touches all four sides of pan.

5. Cover with plastic wrap; set aside in warm spot until dough almost doubles in size, 20 to 30 minutes. Heat oven to 350 degrees, placing empty loaf pan on bottom rack. Bring 2 cups water to boil. (I never do the water in the oven thing. Too lazy.)

6. Remove plastic wrap from loaf pan. Place pan in oven, immediately pouring heated water into empty loaf pan; close oven door. Bake until instant-read thermometer inserted at angle from short end just above pan rim into center of loaf reads 195 degrees, about 40 to 50 minutes. Remove bread from pan, transfer to a wire rack, and cool to room temperature. Slice and serve.

YOU KNOW YOU WANT THE PRINTABLE VERSION….CLICK HERE

Thursday, February 18, 2010

A Red Letter Day

red velvet5 copyCupcakes are in. Red velvet cake is in. But red velvet cupcakes are very in. Yesterday I attempted to make this southern delight for the very first time. And I was not disappointed. red velvet1 copyTrust me (or not) they taste even better than they look. Of course, I went to my favorite book for baking. I was drawn to this recipe over every other recipe I researched on the internet because this recipe used the nectar of the gods--butter-- instead of vegetable oil. I knew that would make a cupcake tasty enough to eat without frosting. Not to worry, I topped them off anyway with a vanilla icing good enough to make your eyes roll back. My kids loved them, the hubby loved them, and I even sent one home with a drooling neighborhood child who longingly watched me ice them. The only stressful part was begging the kids to not stain anything with their red fingers as they licked the bowl.

Red Velvet Cupcakes red velvet2 copy

1 ½ sticks softened butter

1 ½ cups sugar

2 ¼ cups all purpose flour*

1 ½ tsp baking soda*

pinch of salt

2 T. cocoa powder

1 cup buttermilk

2 eggs

1 T. vinegar

1 tsp vanilla

2 T. red food coloring (1 oz. bottle)

Preheat oven to 350 degrees. Mix butter and sugar with electric mixer until light and fluffy. Combine flour, soda, salt, and cocoa powder in a separate bowl. Combine the rest of the wet ingredients in a large measuring cup with a pourable spout. With mixer on low speed, add 1/3 of the flour to butter mixture, followed by ½ of the buttermilk mixture. Repeat with half of the remaining flour mixture and the remaining buttermilk mixture. Beat in the remaining flour mixture until just combined. Fill cupcake tins ½ full. Bake for 20 minutes. Cool, then frost. (Frosting: Beat 1 ½ sticks of butter, 2 cups powdered sugar, and 2 T. cream, splash of vanilla, till light and fluffy.) Can also be frosted with your favorite cream cheese icing.

*For Utah high altitude modifications (4500ft.) , I did the following: Add 2 extra T. flour and only 1 tsp of soda. If you live at high altitude and do not make these changes, your cupcakes will be too wet and probably ‘cave’ in during baking.

WANT THE PRINTABLE VERSION? Click here

April 5, 2010: I am adding this to one of my favorite websites—iheartfaces, hence the button added here.

I_Heart_Faces_Photography_125

Tuesday, February 16, 2010

Grandpa’s Quilt

DSC_0392 copy My Grandpa Ed has ALS (Lou Gehrig’s disease). It’s an awful disease that robs you of every voluntary movement you can imagine—limb movement, speaking, swallowing, etc. Ironically, it rarely affects your brain. My Grandpa  Ed is a citrus/avocado rancher in Southern California. He likes to tell us about how his Dad sold some of their ranch land to build Disneyland and how they planted the trees  there too. Supposedly my Grandpa was offered a life time pass to Disneyland but he turned it down.  That’s Grandpa—no fluffy entertainment for him. He was always too busy grafting trees and catching rattlesnakes on the ranch to worry about spending time with mouse ears. As a child I always remember him saying in his very deep voice, “I’m a mountain man!” Seeing as I live 500 miles away, there isn’t much I can do to help him in his ailing condition. But my amazing family and extended family have really pulled through since my Grandma’s death 3 weeks ago—staying nights with him, feeding him homemade pureed soups, driving him to doctor appointments, cleaning his home, you name it.
So my sister Patty and I decided to do the one thing we could do—show Grandpa we love him by making him a quilt. Despite Patty’s busy full-time work schedule (she lives near me), she made quite a few squares in just 2 days! Then together we layered the backing, batting, and quilt top. We stretched, we pinned and got it all ready for the quilting process. I finished it off with my hands and tears working overtime, and tomorrow the post office will take it away. I hope this mountain man knows how much he’s meant to all of us—even if he has ‘just’ been our step Grandpa. As an adoptive mom, trust me, I know that blood doesn’t make a family—relationships and love do.

granpas quilt 007 copy granpas quilt 011 copy

Saturday, February 13, 2010

Spring Rolls

I am sure I have mentioned here before how much I love, love, love Thai food.  And when I get a craving for it, watch out. Two days ago I had lunch with my sweety at Thai Ruby here in Provo.  Their Beef Salad and Tom Ka Gai (Tangy coconut chicken soup) are my favorites. I get those two (and more)  every time we go. But unfortunately, they do not have spring rolls on the menu. And I don’t quite have the guts to make that suggestion. But I should, because I am bossy. I’ll think about it.  After all, they owe me because twice I’ve tried to go their when my craving leads me to near madness only to find a sign on the door “Vacationing in Thailand”. I drag my hands now the glass door crying “No, please!”

And then there is the Thai House is Lehi on Main Street. Now thank goodness they have proper spring rolls! Mmmmm…mmm..mmm they are so good. And their wonton soup is to die for. What did you just say? You don’t know what spring rolls are. (*audible gasp*) They are kind of like an egg roll but the ‘skin’ is a thin piece of rice paper filled with fresh veggies, lots of cilantro and mint. Basically, a rolled up salad with a tangy dipping sauce. Usually when I make them I eat so many I make myself nearly sick and then don’t make them again for a few more months. Well, today was the blessed day that the spring roll making returned to our household. Paul even helped! And my good ol’ Mexican enchilada-rolling skills always come in handy when making these. I like Martin Yan’s recipe from his Quick and Easy book (love this book!), but any recipe will do that’s loaded with veggies and mint. (Look on Food Network’s site.) But do follow his suggestion of just brushing the rice paper rolls with warm water and letting them sit for 30 seconds before rolling. That technique works much better than soaking them in hot water. That technique always yields ripped rice paper rolls and an angry Cynthia.  My photos are ugly in this post, but trust me, the food was delish.

DSC_0373 editDSC_0377 copy

To make things even yummier tonight I did my best to imitate the aforementioned Thai House’s wonton soup. I’d never made Wonton Soup but after seeing these recipes by Veeda in the Daily Herald the other day, I knew I had to to give it a go.  After all, it is the Olympics and I have the Olympic spirit. Sort of.  Wow!!! So good, so good, so good. Did I mention how good this soup recipe was? Try it. Thanks Veeda! (This beautiful photo is from her fab website White Lotus Cooks.)won ton soup.jpg

Forget Me Nots

I love this sweet and modern bouquet of forget-me-nots flowers. I digitized this one pretty easily since it’s just circles with stems. But already it’s one of my favorites. Who says flowers can’t be turquoise with gray stems?
DSC_0291 copyDSC_0314 copy

Macaroni and Cheese

DSC_0318 copyI mentioned in my previous post that my Grandma is the first person who taught me to make Mac n’ Cheese. Now, I still love my Grandma’s recipe, but nowadays I prefer my macaroni made with a bechamel sauce and a good pound of sharp cheddar with gruyere (or regular swiss is fine too). I usually make Martha Stewart’s recipe as found in Favorite Comfort Food but this time I tried Barefoot Contessa’s recipe—complete with sliced tomatoes on top. I really liked it. Then again, what’s not to like with all that cheese and breadcrumbs?

Thursday, February 11, 2010

Farewell Grandma!


I lost my Grandma almost two weeks ago. Although she was 79 years old, it still was not expected. My friend Laurie put it best--when you lose a grandparent, you feel very small again. I've felt very small lately and miss her already.

My Grandma was an excellent seamstress and not too many years ago said to me, "They don't even teach you how to do flat-felled seams anymore in home ec. classes!" I was quickly thankful that I knew how to do a flat-felled seam so that I could swing my arm in mock exasperation with my Grandma and say, "Yea, why not?!"
My Grandma was an excellent cook. She helped start my first recipe box when I was 10 years old. The first recipes I wrote down? Her macaroni and cheese--complete with a can of evaporated milk and chopped onions and of course, egg nog. She decorated wedding cakes, entered and won recipe contests, and wrote recipes for her local paper. I loved her 'Flub Dub', her homemade chocolate Easter eggs, her avocado pie (Grandpa was a citrus and avocado rancher) and her pomegranate jelly made from her own tree of course. She made the best animal pancakes when my parents were out of town and we always looked forward to those visits.

She died on Ilene's birthday so I cried that day as I made my daughter a homemade chocolate cake. Although sad, I thought it fitting that I baked a cake the day I lost her. I had wanted to make her a red velvet cake and thought I would call up Grandma and ask her what she knew about red velvet cakes. But I never got the chance.

Yesterday I read the food section in the paper and clipped out a recipe for a Chinese Wonton Soup. As I did so, I smiled and thought of Grandma and her endless clippings of recipes from newspapers as well. I was sure she was smiling too. Farewell Grandma! I hope you get to teach cooking classes in Heaven because Heaven wouldn't be Heaven without you and delicious food.

Friday, January 29, 2010

Photoshop Elements is Gonna Kill Me

three kids before after
 Today I wasted many, many hours editing my photos. This is partly bad because I needed to fill orders and clean my house, and partly good because look how fantastic my photos look now! (Yes, these are old photos, leave me alone.) I was feeling woozy after donating blood today (hmmm…maybe it was the Lorna  Doon cookies combined with apple juice afterwards <*yikes*> that made me woozy) but anyway, I was too weak to do house work (*wink*) so I fired up my lap top, sat in my sunny bay window, and wasted many an hour doing nothing but fun stuff.  I think I’ll have Paul pick up In-N-Out burgers tonight as the Red Cross blood sucker warned me to eat some extra protein tonight. Where’s the Beef!?
I bought Adobe Photoshop Elements at Costco the other day because all these years we’ve had a pirated copy. (Don’t ask….a certain ex-family member loaded it onto our computer and me being stupid, thought it one of those free Adobe programs you get at Adobe.com.) Anyway….all these photos are touched up with brightness, contrast, messing with color, and adding some great layers I purchased a while ago from Flora Bella. But I also love the textures you can get for free on Flickr. So here’s to wasting time on things I love.

Thursday, January 28, 2010

The Winter Blues

I no like snowsnowy day collage

It no likes me

It’s wet and cold

And make me freeze

Piles of snow gear thrown on the floor

I am always screaming, “Someone shut that door!”

The kids they do

Track it in on their shoes

Mud puddles everywhere

They just don’t seem to care

I cross my fingers and

Hope it is over soon

For I dream of the heat

I promise--I’ll enjoy it before it’s time to repeat

Tuesday, January 26, 2010

Minimum Effort, Maximum Output


orange coral, originally uploaded by meringuedesigns.
There is something fantastic about hearing the buzz of machines hard at work while I am not. My favorite sounds? My Bernina wizzing away at machine embroidery, my dishwasher doing what I hate, and of course, my washing machine saving me from beating clothes on a rock down by the river. Minimum effort, maximum output. Isn't technology great?

Thursday, January 14, 2010

Happy Birthday to Me


Like you, I have been haunted by the scenes of suffering in Haiti. It kept me up last night. So my birthday gift to myself was to donate to LDS Philanthropies, where I know 100% of my donation goes to emergency relief efforts. I am so humbled to be part of a church that is always on the the frontline of helping those who suffer around the world--whether it's emergency efforts like those needed in Haiti, building water systems in the Congo or donating wheelchairs to the disabled.

Please find your own way to help...no matter what charity you prefer. In response to my donation, I then received the best birthday present ever:

Dear CYNTHIA XXXXXXXX,

We are grateful for your donation of $XXXXX to Humanitarian - Emergency Response.

We appreciate your efforts to make a tangible difference in someone's life, and to bless the lives of others around the world. 100% of your donation goes to help those in need.

Sincerely,

Humanitarian Services

The Church of Jesus Christ of Latter-day Saints

Happy 36th Birthday to me.

Saturday, January 09, 2010

Anti-Winter Pillow is Back!


Winter is evil. But somehow bringing back my anti-winter pillow again makes me smile. Loaded with bright cottons and my dahlia design this pillow makes me feel like it's almost time to put on my sandals and shorts.


Simplicity Bias Tape Maker

bias tape maker If you don’t sew, just skip this post. Because it will be full of boring details. If you do sew, read on baby!

There is a new handy-dandy gadget out there to make bias tape for all of sewers! It’s called the Simplicity Bias Tape Maker. Huh? What do you use bias tape for Cynthia? Um, everything—binding necklines and armholes on clothing,  quilt binding, but especially my birthday banners. Each banner needs about 100 inches of bias tape so you can see why I NEED to make this stuff fast and in bulk. At about $75 it is a pricey gadget, but worth it if you make a ton on a regular basis. Otherwise, just make it by hand because while it does save you some time, you still have to do all the prep work.  Here’s how I make my 1” double-fold bias tape.

DSC_0179Cut 2” strips (notice I do NOT cut on the bias for tape needed for my banners….totally unnecessary). Yup, that’s a huge stack of strips there. 2 yards worth of fabric.


Sew the strips together. I prefer to sew mine together on the bias (more professional looking, less bulk at seams) and chain piecing sure helps. Then you gotta clip all those blasted ‘triangles’ off of each end as you cut the chain pieces apart. Don’t swear, just make sure you’re listening to great tunes on your ipod. My choice at this particular sitting: Coldplay’s Viva la Vida.  (That album is so good you’d think it had lots of calories and fat.)

DSC_0184 DSC_0186

 DSC_0188Please, do pick up after yourself, unlike yours truly.


DSC_0190 Yup, you still gotta iron the seams to one side before ‘loading’ the fabric onto this little internal combustion engine. Oh, and make sure you bypass that stupid made-for-monkeys fabric roller—totally worthless and a waste of my precious time. Just keep your masses of strips untangled every few feet and you’ll be fine.

DSC_0172 


DSC_0195Voila! I wound my now 350 feet (not a typo) of bias tape (or straight-grain tape) onto cardboard scraps and breathe a sigh of relief that I won’t have to do this for another few weeks. I’ve seen talk here and there on the web from others about why I charge so much ($40) for my banners. Well, after seeing this, maybe you know why. Making the ‘rope’ for my banners is definitely the bottle-neck in the banner making process. I truly despise it, but this handy little gadget has made it a bit more bearable.

pink banner

LinkWithin

Related Posts Plugin for WordPress, Blogger...