Monday, November 07, 2016

Trees and Faith and People


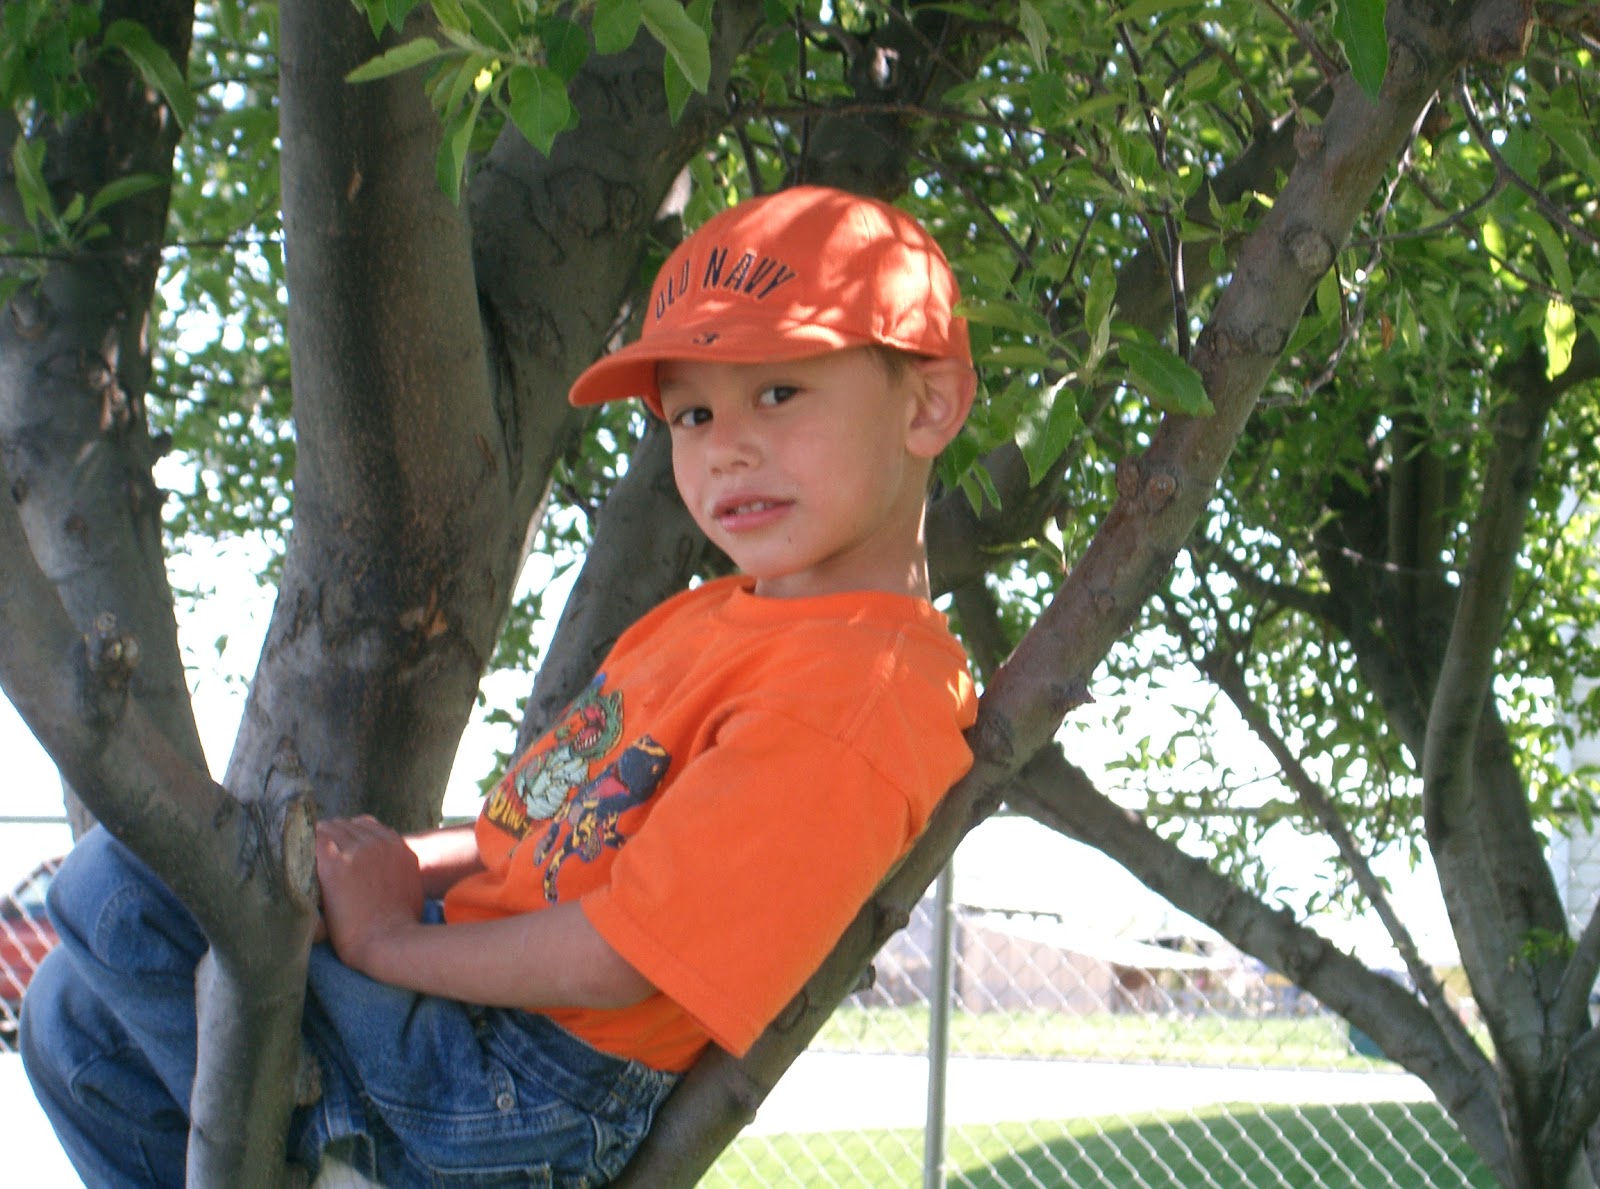
Nathan in Tree 2.jpg
Nathan the tree climber, 2004, age 6.
When my son Nathan was a toddler I told him that I was heading to the nursery to buy a tree for our yard. Up until now we had only installed a sprinkler system and some struggling hydroseed for our lawn. It was a sad little yard, hot and shadeless. When I came home from the nursery, Nathan took one look at that sapling of a tree and with disappointment exclaimed, “Mom I wanted the kind of tree you can climb!” Fair enough. I wanted shade and he wanted to climb. Neither of us would get what we wanted, at least not yet. It was going to be a while. Years in fact.

Spindly little Tulip tree. The wind later snapped it in half. :(

We moved by the time Nathan was eight so he never got to climb a tree in our yard nor did I enjoy any shade at that house, but I was determined to make both happen. In our new house, once again we had the arduous task of putting in a yard. And that meant planting more trees. We planted Ash trees, Flowering Pears, Aspens, Redbuds, and Maples. Ten years later I have my shade. And maybe Nathan is too big to climb trees now, but his little girl or boy will get to climb our 23 trees someday. They'll be large enough by then.
Birds feeding under my Patmore Ash

Thankfully I do have shade now. I need its refuge. This sun worshiper is getting too old to sit bare-faced in the hot backyard anymore without a bit of respite from the glaring sun. As I sit under my 10-year old trees, listening to the messages in the rustling leaves, watching the birds eat from the orange feeder, I think about my little son and his desire to climb a tree that couldn’t even bear his tiny body weight and how everything worth having in life takes as much time as growing a climb-able tree. Faith. Healthy relationships. Healing. Patience. Perspective. The messages in those fluttering leaves have taught me how God speaks to me--subtle but sure. Trees take years. So do people.

Orange tukips in Keukenhof, Netherlands

After ten years, some tree roots are large enough that they are visible through my lawn. I planted about 50 orange tulip bulbs a few weeks ago. As I dug holes all around my yard I kept running into the deeper but smaller, more spidery, tree roots. I did my best not to disturb them, to let them do their own thing, and to carefully plant the bulbs around the roots into our rocky Utah soil. Those thin little roots will get thicker and more stable year after year. They'll keep progressing and spreading, sending out more roots, like I am, even when, or especially when, growth seems to be negligible and even non-existent.

Nathan the graduate under our shady Maple.

Last week we hiked through Zion's, in Kolob Canyon, through a thin and narrow passage filled with brightly colored fall trees. As we hiked, a gust of wind came through quickly and I heard that familar movement of leaves. Paul stopped and said “I love that sound, the rush of wind through a narrow canyon.” He heard wind but I heard God, once again whispering to me through rustling leaves, that everything is going to be okay. He is aware of me. I matter. Be patient. Let my roots grow deeper. He has given me shade for now, and soon it will be time to climb.

Autumn leaves in Kolob Canyon

Saturday, September 10, 2016

Taking my Son's Senior Portraits

Graduation was months ago. My son is now living in the Dominican Republic as a missionary, but finally I am writing about his senior portraits. It is possible to take your own kiddo's senior portraits. Here is proof!
Love taking photos on a cloudy day, no harsh sun.

Nathan is a happy kid. But put him in front of a camera, especially when it is drizzling with rain in early May, and out comes the crabby kid.

The photo below was at the beginning of the photo shoot. No smiles. Sheesh kid.

You can see the rain in this shot!


The photo below is at the end of the photo shoot when he had finally loosened up and he allowed his sister and me to tease him and make him laugh.
Taken in Provo, Utah on Boat harbor Drive, near Utah Lake. ISO 250, f/4, 1/800 second,  

I took all the photos with my Nikon d750 using my Nikon 85mm 1.8 prime lens. It's a beautiful portrait lens. Couldn't be happier with its quality.

All photos are edited in Adobe Lightroom. I added a slight vignetting around each photo for drama and depth.
Photo taken in Spanish Fork, Utah on a cloudy day at 2:00pm.

Taken on Boat Harbor Drive in Provo, Utah near Utah Lake

My favorite! ISO 250, 1/200 second, f/4, 

One thing that was smart was bringing my daughter along to make him laugh and smile eventually. Aren't they the cutest?

I even got in a photo or two. Just to prove I was even there ya know.


I printed the graduation announcements at AdoramaPix using this template and the pearl finish for the paper.  I am not a fan of collages for announcements. Pick one amazing photo for the front, and one for the back. Don't clutter the announcement, keep it classy and simple.

Adorama Pix template used.

I took the photos on a Saturday afternoon and had them ordered by that night. Not bad for a day's work!


Oh, and why do kids grow up so fast?

Thursday, August 04, 2016

Wood Stairs

I have been wanting to rip the beige shaggy goodness off of our stairs for several years now. Finally it is done!

My kiddos didn't want wood stairs because they prefer to lounge on them and wood stairs ain't good for loungin'. Good grief.


But I am the queen of my castle, well sort of. So once the kids got old enough that falling down the stairs was less likely, and once they accepted chairs for sitting, not stairs, we began the process. Here are some before pictures:
bottom stairs were always dirty....always :(

shaggy goodness should've stayed in the 1970s

posts were just 4x4 pieces of wood stained. Nuttin' special.


I sent our contractor some inspiration photos. I wanted wood treads, white risers, and wainscoting. Thank you Pinterest!


Demolition began.....
Bye bye carpet and ugly rustic handrails.

Wainscoting begins going up


Once wainscoting was done and sprayed the stairs could go in. I used my favorite white I use everywhere else, White Dove by Benjamin Moore.
White Dove was sprayed on wainscoting and walls


Hickory treads went in next. White Melamine was used for the risers because they are super easy to wipe scuffs off instead of having to repaint scuffs on white-painted wood risers.

Every project take longer than you think but it's always worth it in the end. I repainted some of my outdated picture frames navy blue and we are done!
not really into yellow and orange anymore


Monday, August 01, 2016

Mini Make-up Bags

Every lady needs a little make up bag for her purse. I have been making these bags for about 8 years now and giving them out as small gifts to friends and family. I can make a bag in about 15 minutes if not embroidered. Adding some embellishments like embroidery will add a few more minutes.


Enjoy the tutorial! (Click on any photo to enlarge)

- Cut 2 lining pieces:  6 1/2" x 8 1/2"
- Cut 2 solid linen pieces:  9 1/2" x 4 1/2"
- Cut 2 printed cotton pieces: 9 1/2" x 3"
- scrap of same printed cotton piece for the applique of the embroidered bird
- Heat n' Bond Lite (optional) enough to applique the bird, follow directions on package
- One 7" zipper (I buy these in bulk at Zipperstop.com)
- Heavy Duty spray starch
- Tear Away embroidery stabilizer of your choice
- Scribbled Bird design, use the 2x3" applique

Starch all fabric pieces before starting

Sew each linen piece to each top piece to form the exterior of the bag. Add some tear away stabilizer to the back in preparation for machine embroidery. Place the hoop in the bottom left corner. Of course you can embroider the bird anywhere, I just like it in a corner.

Attach hoop to machine, place bird in desirable location (at least an inch from each side, and stitch placement stitch.

Stitch placement stitch first
Optional but recommended, fuse Heat n' Bond Lite to scrap for bird. Prevents puckering and fraying.

Second, place your fabric scrap over the placement stitching and stitch in place.

Remove hoop from machine and trim excess fabric from bird.


Finish the topstiching for the bird.
View from back. Always tear away excess stabilizer after embroidery is done. After embroidery, trim down exterior pieces to match the size of the lining pieces, 6 1/2" x 8 1/2"


Place zipper, face down onto your exterior embroidered piece of fabric.


Place one lining piece face down onto zipper and pin.

Sew the exterior and lining pieces together with a regular zipper foot. Move the needle all the way to the left and use the edge of your presser foot as a guide along the edge of the zipper.


Needle to left, stitch length of 3

This is what it looks like after sewing one exterior piece to one lining piece with the zipper.

Place the lining and exterior pieces sewn with the zipper, wrong sides to together, as seen below.


Then, following picture below, take the other lining piece and other exterior piece and "sandwich" the other side of the zipper between those two fabric pieces.

Pin together just like you did the first time. Lining, edge of zipper tape, and exterior piece should all have edges together.

Sew just like you did the first time.

This is how the bag should look now.


Pulling fabric away from zipper, iron and starch.
Make sure the lining is pulled away from the zipper as well. Iron really, really well or else it will get caught when you topstitch.
Now you can topstitch, both sides. Use the same settings for your machine as before: needle moved all the way to the left, use the edge of the fabric as your guide, as seen below.

This is how it looks all topstitched on the front.

And from the back:

Unzip about 3/4 of the way down.

Place exterior pieces together (right sides together) and lining pieces together (right sides together.)
Where you see the Xs above is probably the most important part of this tutorial. The pins at the Xs have to match up perfectly, as seen in the photos below.
The black line marks the spot where you should pin and where you want the needle of the sewing machine to pass through.

Pin and sew through the black line
Make sure the zipper tape is going the same direction and make sure the topstitched lines match perfectly as well. You will place the pins (as seen in the Xs two photos up) at the exact spot at which you want the sewing machine needle to pass through. You want to sew far enough away from the metal of the zipper (or you'll bust your needle) yet still catch the zipper tape for a nice finished look.

Sew all the way around the perimeter (leaving opening to turn)  about 1/2"-3/4" seam allowance and trim corners.

Turn bag right side out through opening in lining, tuck raw ends of lining into bag and sew shut. (Don't you love my green chipped manicure!)

Tuck lining into bag, iron, and enjoy.


LinkWithin

Related Posts Plugin for WordPress, Blogger...