Monday, December 17, 2012

How to Make Embroidered Tags

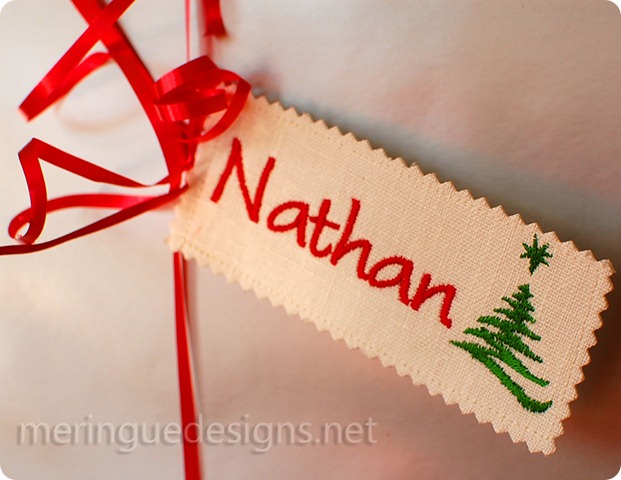
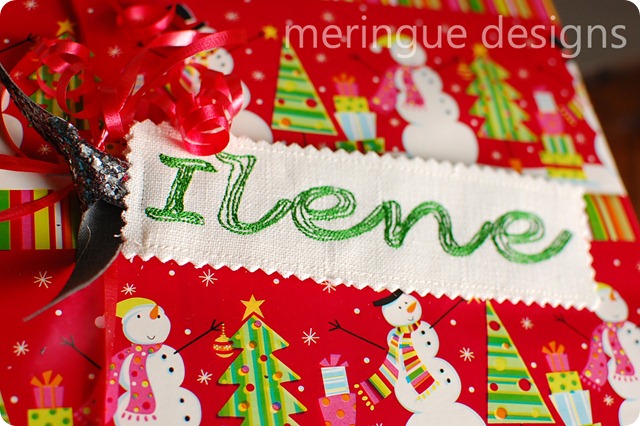
I love making these reusable gifts tags. When Christmas is over this year, I’ll save the tags again for next year. (If I put them on gifts for others I hope they use them as a bookmark.) They sure brighten up otherwise dull-looking wrapped presents for my kiddos.

gift tags (7) watermark close up

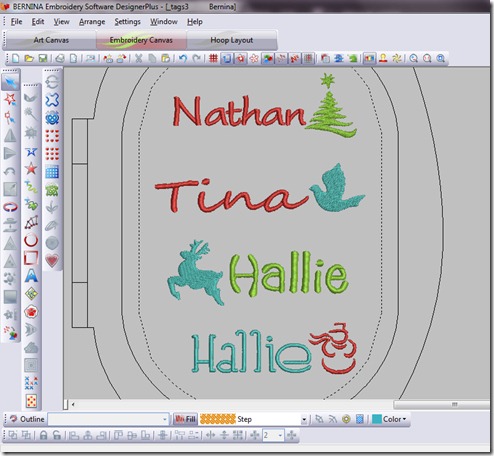
You will be using a font that is approximately 1” tall. I like adding an extra little mini Christmas picture as well. You can buy them here.

I can make 4 tags at a time in my large 5”x10” hoop. Arrange all your names and designs in your hoop and stitch.

tags

Once I stitch my designs (I used linen fabric and a very stiff tear away stabilizer) I cut them out into rectangles using regular scissors or your rotary cutter and back them with another piece of linen. I chose not to remove the stabilizer so that the tags would stay firm. Pin your front and back piece together and using pinking shears, cut only the edge that will hold the ribbon tie. For my gift tags, that’s the left side, as seen below.

gift tag2

Cut a piece of 10” ribbon, fold in half, and place the folded part between the pinked edges of the two layers of fabric. Sew all the around the tag. Then pink the other 3 edges close to the stitching—but don’t cut the stitching.

DSC_0269

All done, not bad for 5 minutes of sewing, huh?'

gift tags (5) watermark

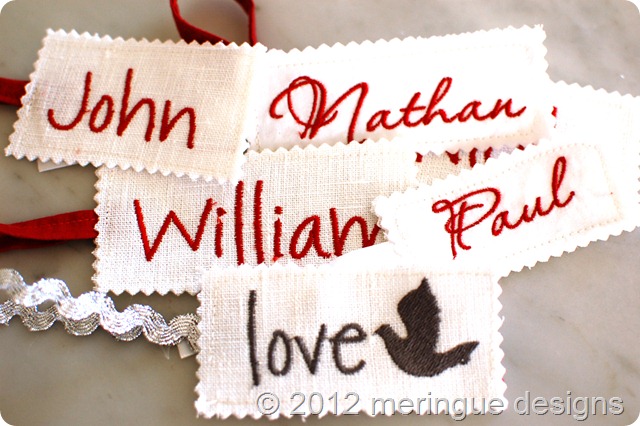
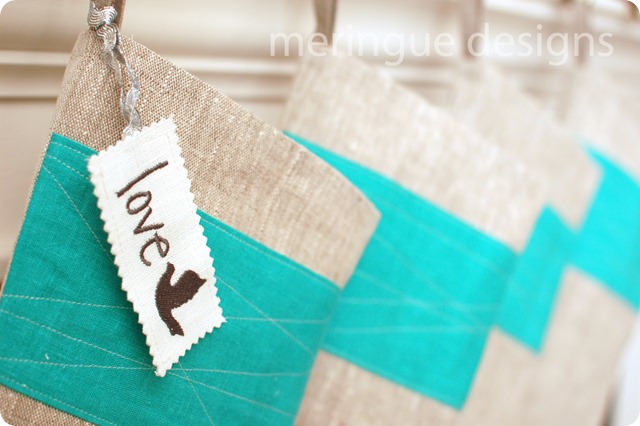
The tag below feature my scribbled cursive alphabet. I chose not to make a few tags specific to Christmas so that my children can use then as bookmarks after they open their gifts.

gift tags (1) copy

The tag below features the Riverside Alphabet and the reindeer design.

gift tags (4) copy

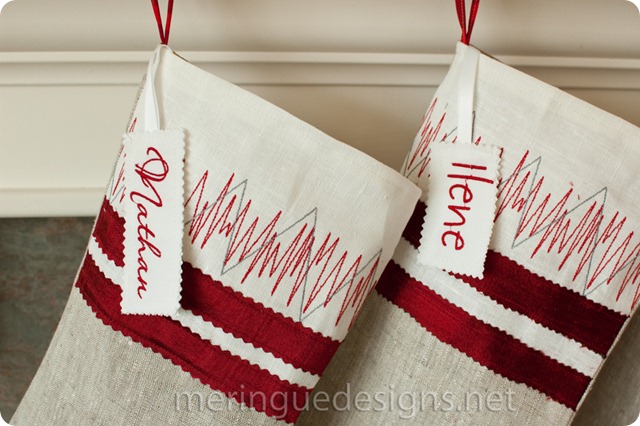
Great to personalize Christmas stockings as well:

DSC_0266 copy

DSC_0220 copy

Merry Christmas!

cynthia logo

Monday, December 10, 2012

Gallery Art Wall

I’ve been achin’ to make a gallery art wall in my family room. I finally got around to doing it last weekend. I’m pretty darn happy with it too! (It was super duper nice to tackle a project that didn’t involve my sewing machines. Been working like a dog sewing Christmas stockings again.)

DSC_0282 copy

I think TVs are a real eye sore to most rooms. Unless I had a media room (no thanks) or an armoire (do they make shallow armoires now for flat screen tvs?) I prefer to keep the TV small. Thankfully Paul agrees. Our family room is thee room in the house where we spend 90% of our time, so a smaller TV for this room suits us just fine.

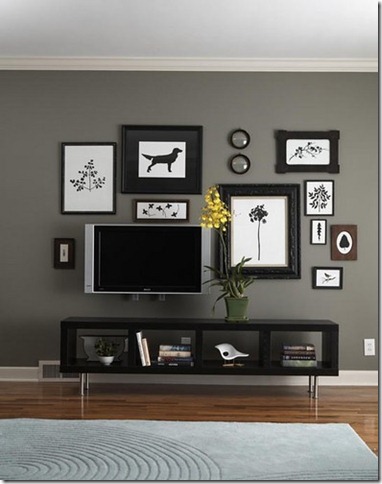
I saw these gallery art walls on Pinterest and made them my pattern to follow:

gallery

(above photo can be seen here. I couldn’t put the direct link as Pinterest said it goes to a spam site or an inappropriate site. Whoa!)

gallery2

(above photo courtesy of The Hunted Interior)

My TV isn’t wall mounted (didn’t want to add electrical outlets for the power in the middle of the wall) but both of the above galleries were the look I was going for. Kind of plain right now huh?

DSC_0273

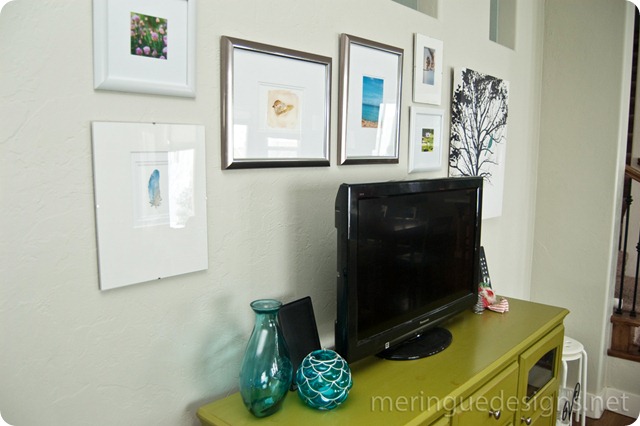
So I bought a bunch of frames in varying sizes at craft stores before I even knew what I would put into the frames. It’s easier to print your photos in the correct sizes after you have your frames placed where you want them. Not to mention, some photos will need to go vertical, some horizontal.

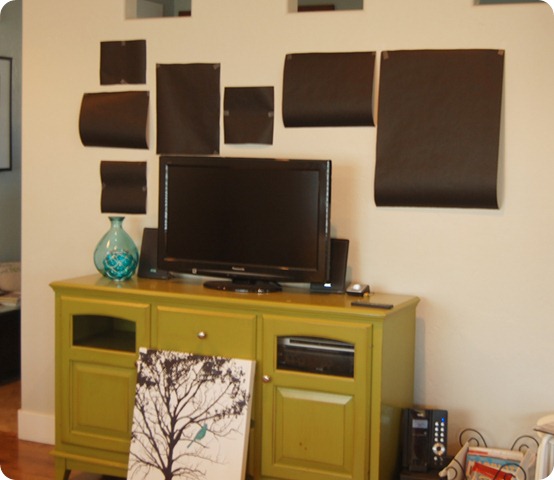
I used black craft paper to trace my frames in the correct sizes and had my dear friend Kelly come help me map them out.

Here’s one of the arrangements we came up with. We kept re-arranging the craft paper, taking photos, and then took a vote. Obviously this was not the winning combo:

DSC_0276

After printing my own photos at Costco.com for 24 cents a piece…..

print waimea beach 5x7

(Ahh Waimea Beach On Oahu in Hawaii)

print house (11) 4x4

(Chives in my back yard)

photo 4x6 spring snowstorm

(Spring blossom with frosty snow in my backyard)

waimea valley (9)

(Lily pond in Waimea Valley, Oahu, Hawaii)

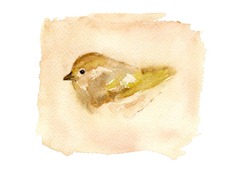
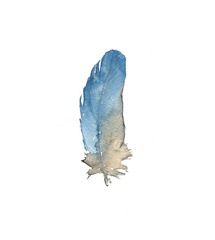
……..and buying some amazing watercolors from Renee Anne on etsy…..

renneeanne on etsyrenneeanne on etsy2

(Above: A Bird I Once Knew by Renne Anne via etsy,  Sky  Blue Feather by Rennee Anne vis etsy)).

….and lastly I wanted to find a canvas print. I really like the black and white tree  with turquoise bird that I found at Hobby Lobby for $40. The vases are from Hobby Lobby as well, $5-10 each. What a shock to find something modern at Hobby Lobby! I take back everything I said about that tacky store.

The wall is done. It was a good days work but now the focus on this wall is the art, not the black TV. Yum

DSC_0284 copy

I do have to say that I envisioned this project BEFORE I even had the TV on this wall.  It used to be in the corner (see below photo) as that’s the one spot in the room that was wired for satellite. Many thanks to my handy Dad and my 14-yr old son Nathan for rewiring the room to accomodate a TV on a different wall. We have a 4-ft crawl space that Nathan (who is smaller than my dad, obviously) would crawl down into using the webcam on his iPod touch. My dad was on the main floor, watching Nathan’s live video stream and giving him directions. Now that’s team work!!

green corner cabinet2

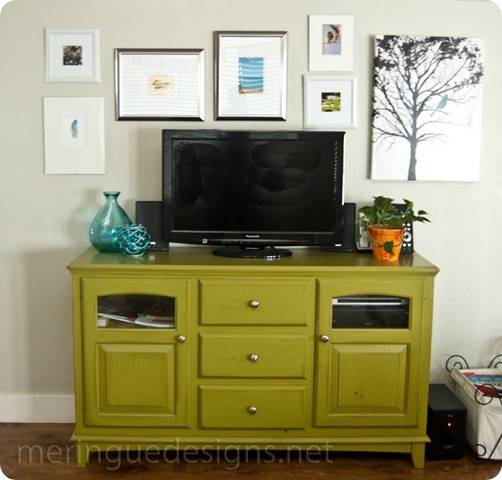
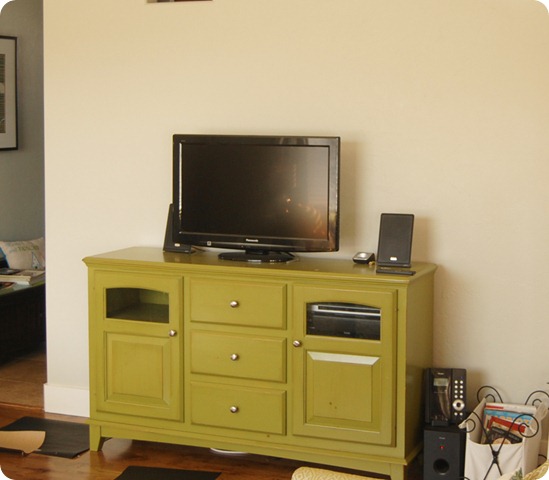
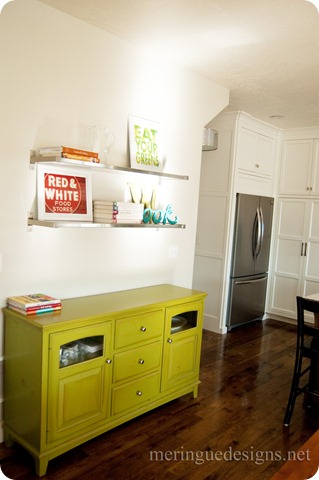
I stole my green TV media cabinet (below) that I had been using as a buffet in my kitchen to get my final result.

DSC_0130 copy

Next summer? I’ll tackle the ugly black ceiling fan.

DSC_0285 copy

Friday, November 09, 2012

Why does handmade cost so much?

DSC_0704

I’ve seen lots of blog posts out there with this same title. So here’s my spin on things.

I get many, many emails from potential customers asking me for discounts. They tell me that they simply can’t afford my prices but they really want my stockings/pillows/etc. I’m not really sure what they are asking me for—having monogrammed stockings or pillows is not a necessity in life.  Buy the basic ones from Target as they are very inexpensive. I am truly flattered that they love my work but there just isn’t much I can do—I simply can’t (and won’t) work just to break even.  That’s not very business savvy according my business management professors in college Smile. When customers ask for a discount I am tempted to ask them if they do that same thing at Macy’s—ask the clerk if they can have a discount if they buy more than one pair of pants. Yup, it sounds silly when it’s put that way. But I don’t say that—I simply reply with, “Price is firm”. Or better yet, I should advise them to buy my sewing pattern and make the stockings themselves!

1.  I live in the Unites States of America, not communist China. A living wage here is much higher.  usa_2 Depending on the time of year, I also have 1-2 assistants. I pay them a decent wage as well. Like my cousin tells me, “We may be Mexican but we don’t work for beans!” Amen, cousin.

2. Self employment taxes are extraordinarily high. At least in my opinion they are high. Most home-based businesses pay their taxes on their individual returns which means that we are taxed by our household income (spouse’s income included) which can be around 10-30%.  To incorporate my business would mean to pay even higher taxes. Sigh. So being honest means I have to pay Uncle Sam.

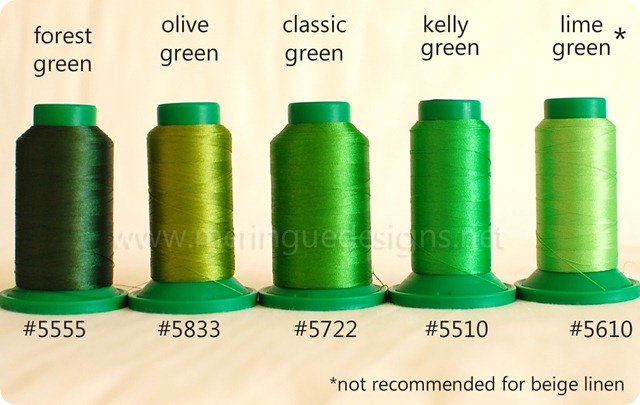
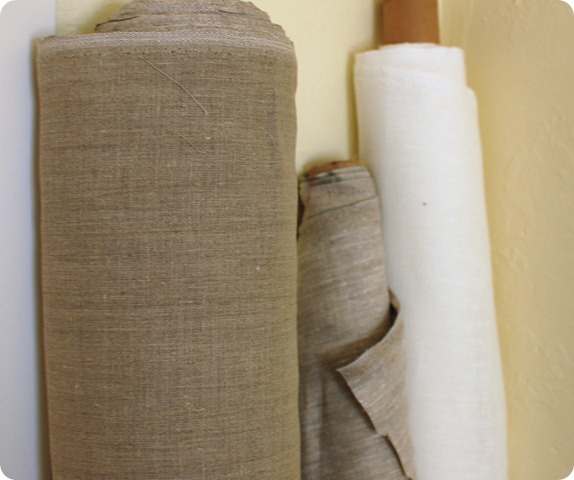
3. Supplies (variable costs) for me include, first of all, fabric. Have you seen the price of cotton in the last few years sky rocket? I pay double for muslin and other cottons now compared to two years ago. I use a ton of linen—a ton. Linen is spun from flax seeds—not cheap. All of my fabrics are man made fibers—silk, linen, and cotton. I do not use any polyester fabrics. Ever. (*Shivers*) I want you to have the best and the best isn’t free. Add to this zippers, stabilizers, thread, etc.
DSC_0939 copy

DSC_0040

3. Equipment (fixed costs). For my business‘handmade’ doesn’t mean that I am sitting by candlelight at night stitching stockings or pillows with a needle and thread. (For many businesses, that is handmade though, well, hopefully not the candle part) In my business I have to have professional software  which costs in the thousands, the best embroidery machine, the best sewing machine, a great camera with changeable lenses,  sometimes hiring a photographer when needed, and all of that costs mucho dinero. My embroidery machine cost more than a car—I’ll just leave it at that. Other fixed costs include Pay Pal fees, credit card fees, website hosting fees, webmaster fees, etsy fees, and on the list goes.

DSC_0041

4. Tender loving care, oh and lots of time. On the stockings pictured below—I digitized every one of those names unique to that order. The snowflakes are my own creation as well—digitized by yours truly. Every individual stocking starts out with me at my computer. The name is typed out in the customer’s choice of  font, I manually space the letters to get the best look—some letters further apart, some overlapping until it is visually pleasing. The snowflakes are then added in, again one by one, spaced to look pleasing all the while remembering that it must all fall within a 7” wide strip of fabric. Okay, too much information, back to being general about things. Notice each of the snowflakes is in a different position, all relative to the name—all hand done. Then the real work at the machines begins. I won’t even try to explain that part!
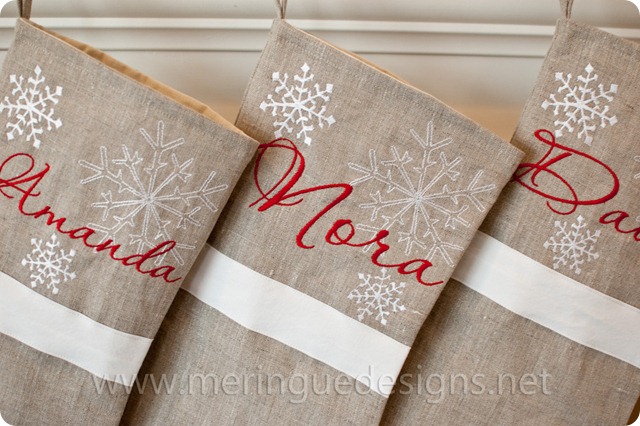
stockings  (12) copy

Do you see the zipper installed in the below image? Exactly, you can hardly see it because I’m good at what I do. Quality, quality, quality. (Shameless bragging, sorry.)

red bird pillow 004

5. The final step is packaging, which my amazing husband does for me. He prints the labels, weighs each package, calculates the postage, buys my shipping supplies, etc. What a great guy! He could easily say to me, “I just worked 10 hours today counting beans, do your own work lady!” But he spends hours a week at night helping my our small business.

6. Unique. I often get emails from clients, “I’ve never seen anything like this before!”. And that’s why handmade costs more than crap made. You are paying an artist. She has a unique talent that she’s willing to share that with you for a very modest price.

Please value that talent.
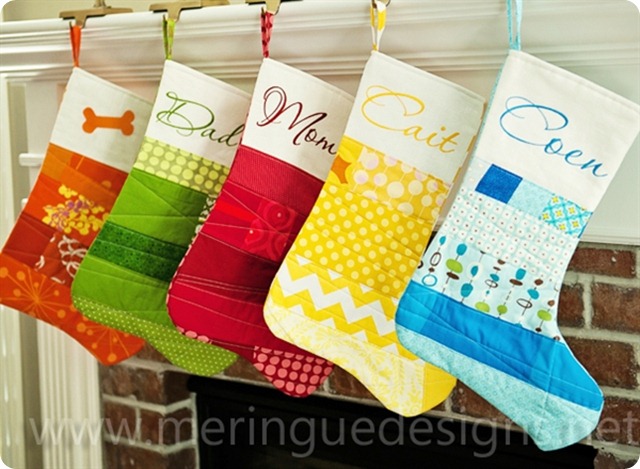
stockings

rainbow stripes pillow 006

Friday, September 21, 2012

Deep Thoughts

It’s been a while since I’ve posted about anything of consequence and meaning to my heart.  I prefer to stay private and blog about food and fabric. That’s just how I roll these days (errr, years actually.)
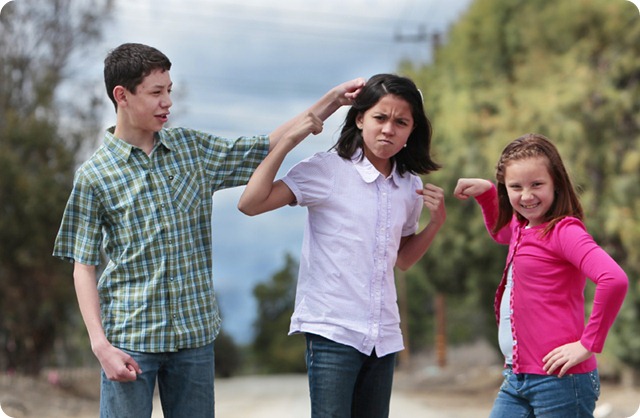
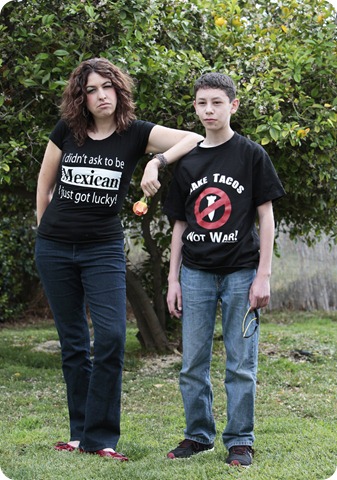
Life has been kinda tough mentally, physically, and emotionally lately. But it has for you too I bet. Nobody has it easy, of that I am convinced. 

What’s been mentally tough is dealing with my children—particularly my son who is now in high school. He is flexing his teenage muscles of independence and that’s tough to deal with. I’ve always loved to work with teenagers—for years I worked with the young women ages 12-18 at my church and loved every minute of it. But when that teenager is your own…..well you don’t always love every minute of it. Yes the below photo is staged but everyday they re-enact this scene. For real.

_MG_5460 copy small

What’s been physically tough is getting back into the swing of things with school back in session for a month now. Paul and I get up early with Nathan and make him a hot breakfast and send him off with a huge sack lunch at 6:45am. He eats eggs and bacon in the dark and it’s mostly quiet, and I’m tired, but in 4 years he’ll be gone and then I’ll wish I had done more.  By the end of the day when I’m washing dishes once again in the dark, I’m even more tired, but that’s just life right now.

_MG_5714 copy small

(A lighter moment with Nathan—pretending we’re tough Mexicans. Well, we’re not pretending to be Mexican , that’s a fact, just pretending to be tough.)

Emotionally what’s tough is trying to figure out what I wanna be when I grow up. By that I just mean that I’m trying to have a bit of self-awareness—am I doing all I can for my kids who are growing up so fast? I feel the urgency of that everyday—they’re growing up so fast. Am I teaching them to be kind because they see me kind?  Do I give enough? Do I serve my fellow brothers and sisters enough? I’ve been given so much and it has to be for a reason—I have to reach out and help more and so often I feel so insular. That’s my prayer every day to my Father in Heaven—help me to reach out and help someone today. 90% of the time it’s my kids or hubby whom I help but I hope I can reach beyond my own little life and be a puller and not a pusher.

P.S. My sweet Ilene was given clearance from her orthopedic surgeon to live a normal life—she can now run, jump, and be a typical young girl. What a miracle. It makes me weep with gratitude. (Post here about her surgery.)

_MG_5763

Friday, September 14, 2012

The Ruffled Tote Bag

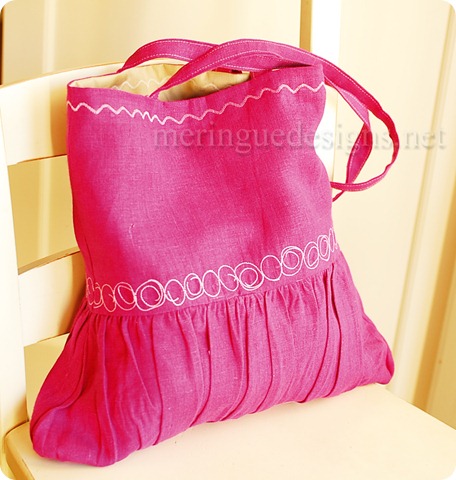
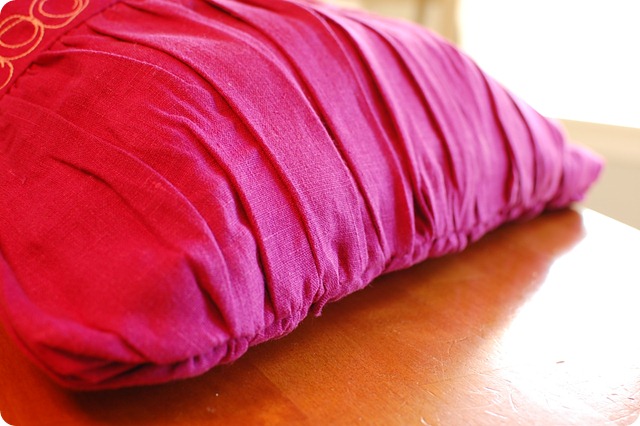
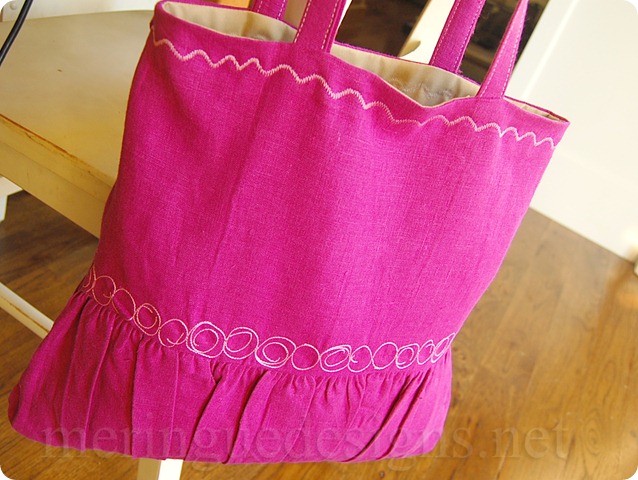
This has to be the fastest tote bag I’ve ever made. No interfacing, just a simple rectangle and lots of gathers using my ruffler foot for the pink version. Or you can skip the ruffles as I did on the beige linen version. The pink is a 5oz linen and the beige is 7oz—both nice sturdy heavier linens for tote bags purchased at www.fabrics-store.com. I love that website—they ship fast too and the prices are amazing.

DSC_0830 copy

This tutorial isn’t very detailed, but if all you need are a little whipper-snapper and can figure things out on your own then all you need are the measurements anyway. If you need more details I suggest buying my “weekday tote bag” pattern for TONS of photos and directions to basic bag making.

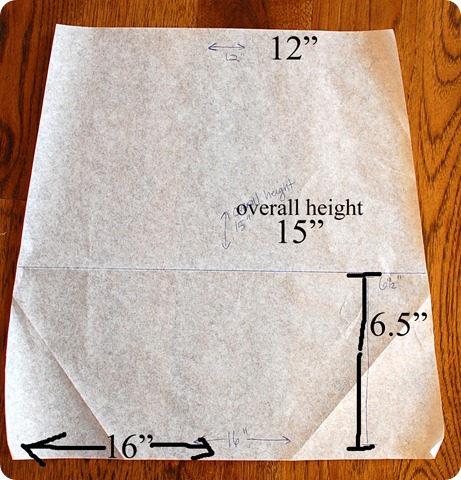
First, draw up a pattern using these measurements:

DSC_0838 copy

For the ruffled version, cut 2 of the lining using the full pattern, then fold on the 6.5” line and using just the upper piece, cut 2 out of the pink linen.  For the ruffled bottom cut 2 strips 6.5 tall by approximately double the length, or 32”.  (To eliminate the ruffles use the full pattern piece to cut 2 of the exterior, two of the lining.) For the straps, cut 2 pieces 3”x 23” or whatever your desired length would be.

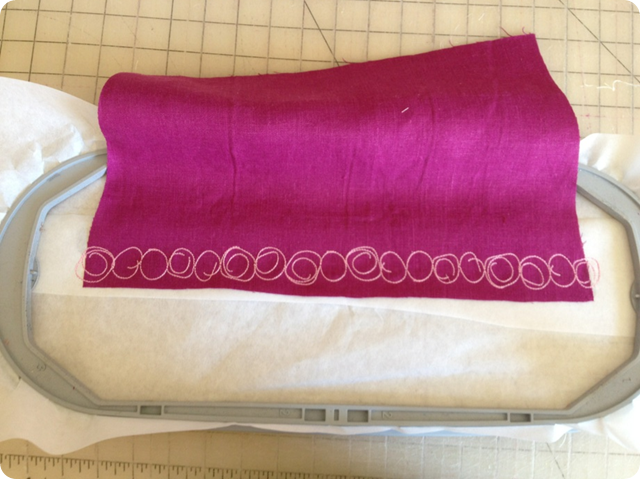
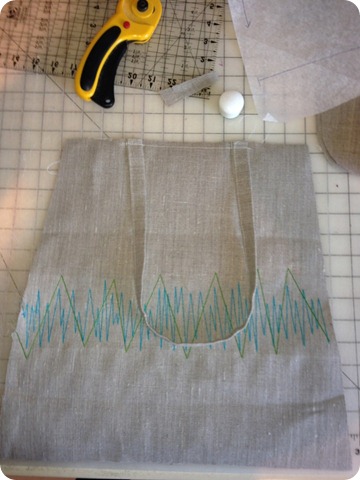
To embroider a border,  hoop some stabilizer and spray with temporary adhesive spray. Place your upper bag piece so that the border will stitch 1/2”-1” above bottom raw edge. It doesn’t matter if the border stitches off of the fabric on the sides—in fact that’s preferable because you want the border to go all the way to the edge. I think stitching this design took 8 minutes. Nice and fast. I stitched in a pale pink.

ruffled bag3

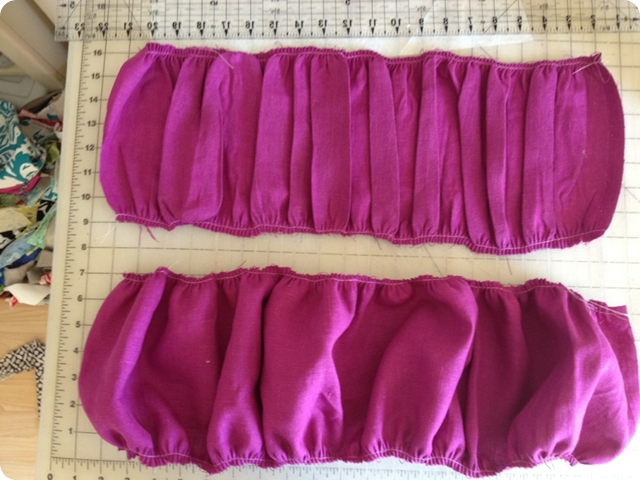
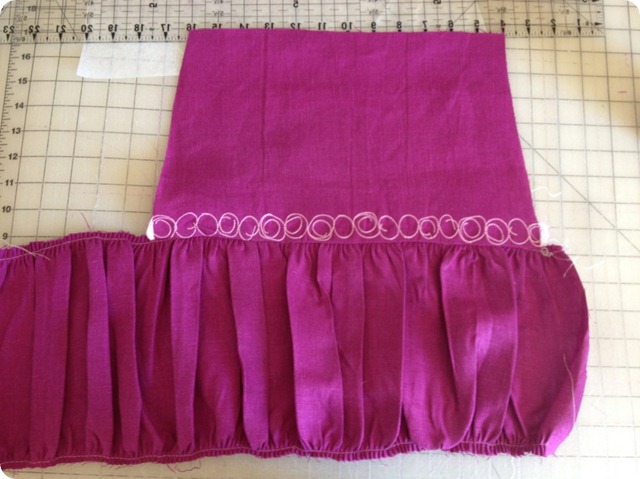
Now you’ll make the ruffle part using your ruffler foot. If you don’t have a ruffler foot, my apologies, you’ll have to gather with two long basting stitches and pull to form gathers. The ruffle on the bottom is what it will look like before ironing. The ruffle on top is after I ironed the ruffles/pleats in place with lots of steam. This is why using linen is soooo great for this project—holds creases really well.

ruffled bag2

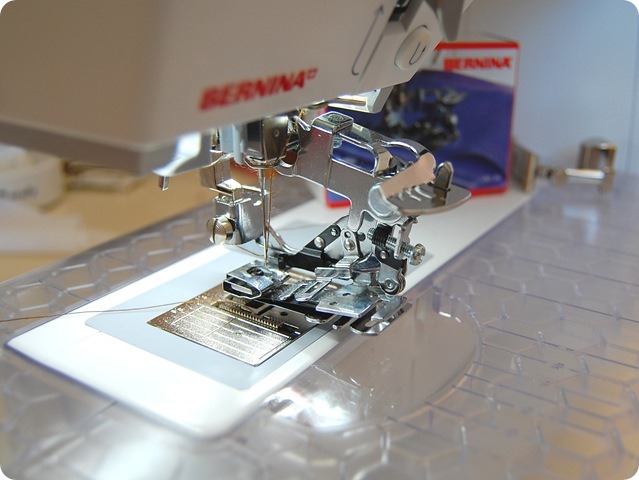
The ruffler foot is the best invention for sewers. Ever. I’d rather put a hot poker through my eyeball than gather ruffles with basting stitches.

ruffler foot

Attach ruffle to your embroidered top piece. Place your pattern back over and trim excess ruffled fabric away.

ruffled bag

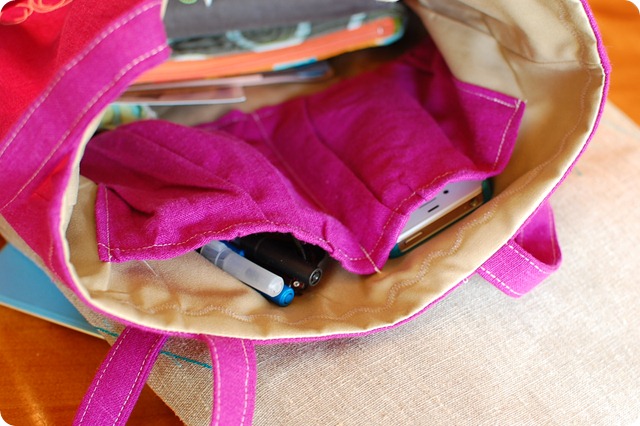
Use the excess ruffle to make a cut pocket on the lining.

DSC_0845

To make the straps, pretend you’re making double-fold bias tape—you’ll fold in the raw edges on the long side towards the middle, then fold in again, iron in place, stitch to bag front and back. You’re finished straps will be approximately 3/4” inch wide. Linen is sturdy enough that you don’t need any interfacing for straps this skinny. (Wider straps would need interfacing.)  Attach straps to your bag exterior in a pleasing manner, baste in place:

ruffled bag4

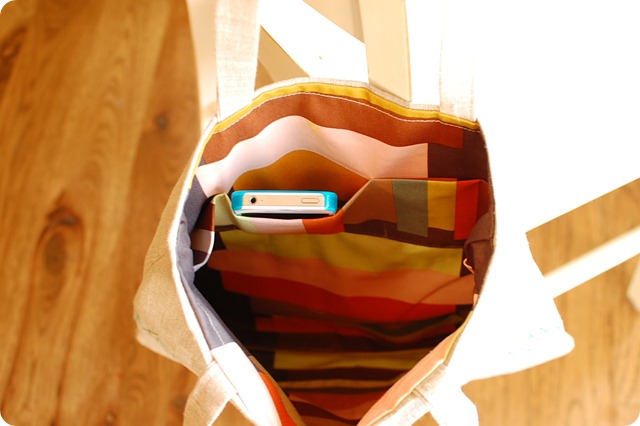
Assemble the lining in same manner, leaving the bottom with 8” opening. Sew the bag to the lining, right sides together around top, pull lining through, topstitch the top of bag and don’t forget to sew the lining shut. I opted to have some pockets inside but you don’t have to:

DSC_0839

Yummy, ain’t it?

DSC_0841

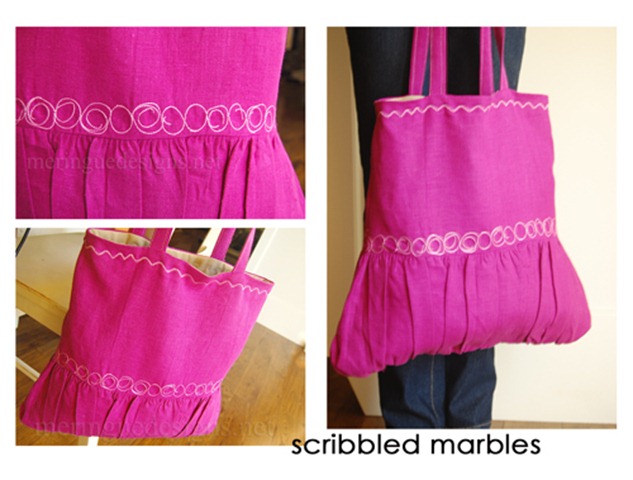
scribbled marbles

The “scribbled marbles” embroidery design can be purchased by clicking here.

DSC_0827 copy

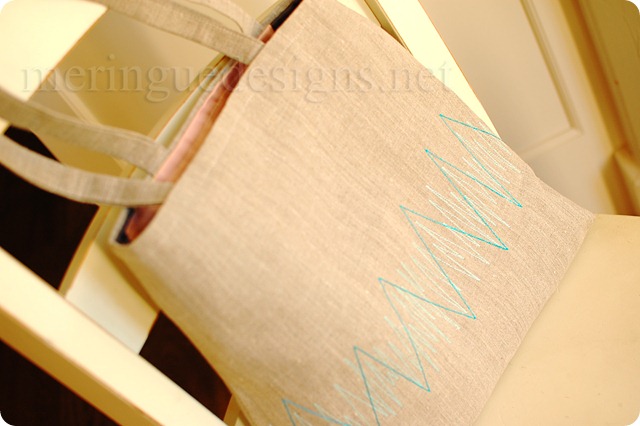
The beige linen version is even faster without ruffles:

DSC_0837 copy

The “tall grasses” design can be purchased clicking here.

DSC_0834 copy

Happy stitching!

cynthia logo

LinkWithin

Related Posts Plugin for WordPress, Blogger...