Tuesday, May 31, 2011

The Rosie Skirt

I bought the book Design Your Own Clothes by Cal Patch last year. After pouring over it I knew I loved it and wanted to try lots of patterns in this book for myself and my girls. My oldest daughter is now 10 years old and it getting difficult to find age-appropriate sewing patterns for her. There are plenty of patterns for toddlers and teens with curves, but what about this in-between-phase of adolescence?

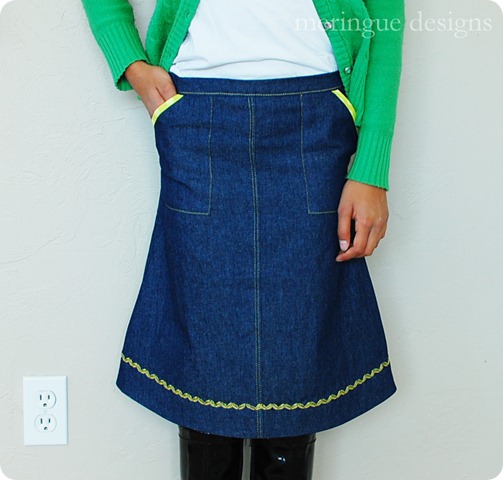
I don’t have a huge desire to make patterns from scratch but I figure I can alter basic a-line skirts and ‘shell’ blouses to accommodate the styles I saw and loved in this book. And when I saw The Rosie Skirt I new I had to make it for my daughter first, and then maybe for myself. Love the pockets and the side-button closure. Yum.

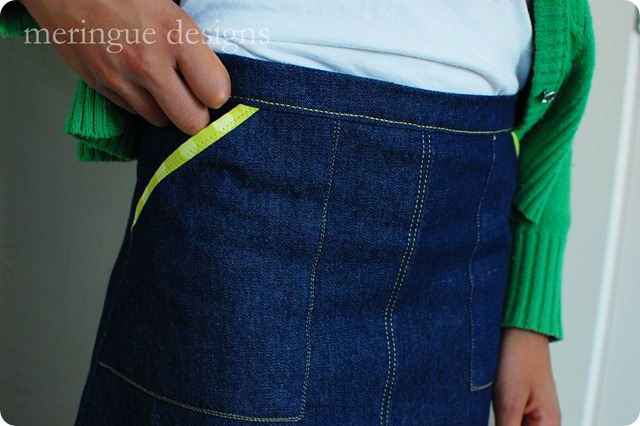
the rosie skirt 3

I used a lightweight 100% cotton denim from Jo-Ann. I love to keep yards and yards of this stuff on hand, washed, and ready to go for sewing projects—skirts, shorts and capris, handbags, you name it.

the rosie skirt (3) copy

A few things I learned—I wished I hadn’t skipped the darts. I figured only women with curves needed darts. Well, the darts add shape and it was a mistake to eliminate them. Luckily, my 10-yr old didn’t seem to mind too much.

I bound the pockets with a limey-green polka dot fabric and love how they turned out.

the rosie skirt (4) copy

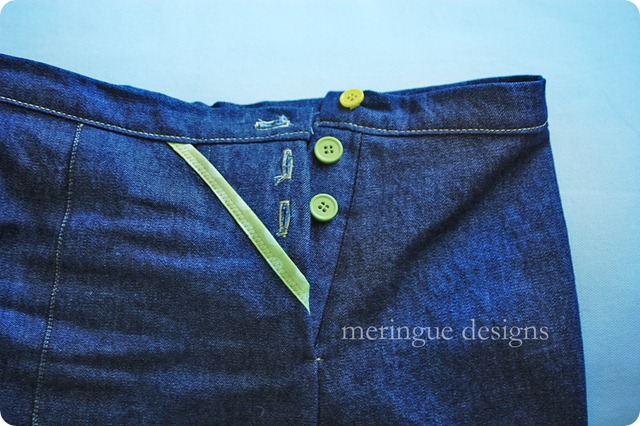
Now what I didn’t love was the bad directions for making the button closure:

the rosie skirt2 (9)

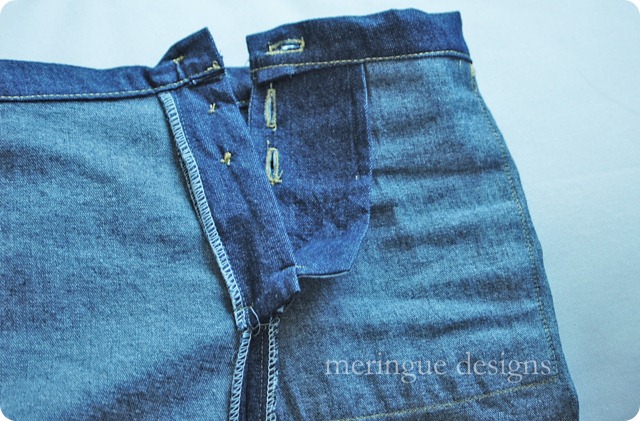
The directions for making that overlap are dubious at best. A few steps have gotta be missing. There is no mention of how to finish the front part—the section with those buttonholes. No lining is mentioned, no overlap, no interfacing, nothing. I had to call my brilliant friend Elaine over to help me figure that part out. She agreed that the editor definitely missed something in proof-reading the book. So we basically made another facing for the front button-holed section. Here’s how it looks on the inside:

the rosie skirt2 (8)

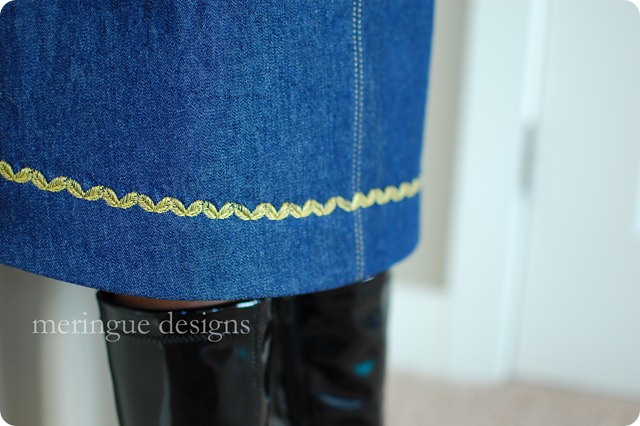
And I finished it off with this gorgeous feather (or are they ferns?) decorative stitch #110 on the Bernina 830:

the rosie skirt (1) copy

I will be making this again and again for my girls. And hopefully one for myself as well.

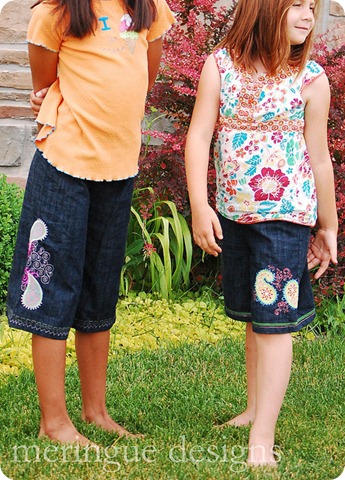
On a side note………..These are the shorts are made for the girls last year with this same denim. (Actually, I think this denim is a bit darker. Love!) I used designs from the Paisley Pack by OESD. Best purchase ever.

denim shorts

Thursday, May 26, 2011

Pillow Case with Scrabble Design

An homage to my favorite game of all time: Scrabble Appliques
Scrabble pillow (19) copy
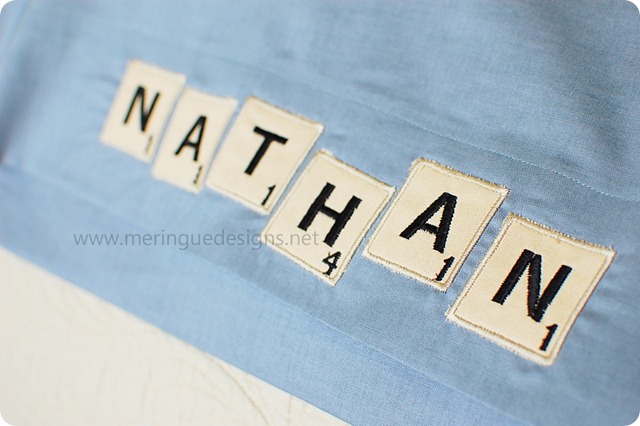
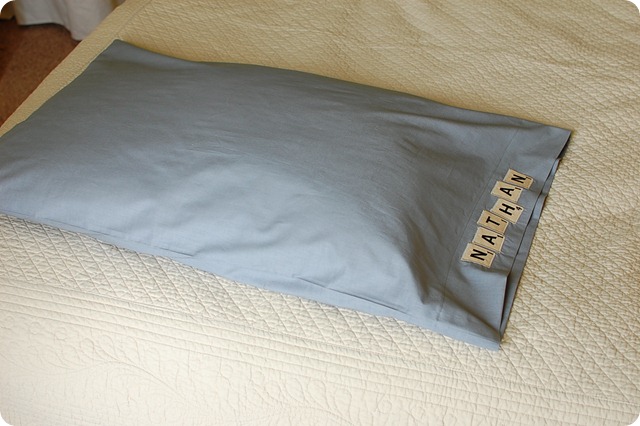
One of the sad parts about seeing my son grow up is that he no longer wants much embroidered anymore. He’s too cool for that. But he did allow me to make him this pillow case with his name on it in scrabble tiles. Wasn’t that nice of him? I guess I kept it masculine enough with the beige tiles and black letters.

Wanna a quick tutorial on how to make a pillowcase? I am sure 90% of you will not need this tutorial…….but here goes.

You will need just 1 yard of 44” wide lightweight cotton. Yup, you’ll use the entire yard. And you don’t even need to cut it into two pieces—leave it as is with that side fold. And don’t bother pre-washing. Live dangerously.

It is easier to iron the cuff into place and then unfold it to embroider. Even if you are not going to embroider it, follow these same steps.

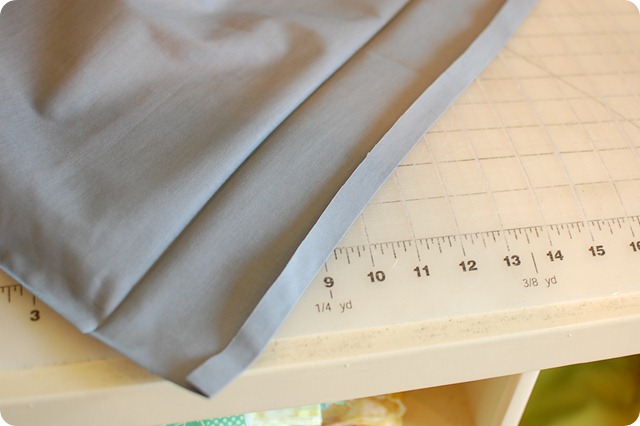
So…fold over the edge of the fabric about 1/2” and iron into place. Then fold over another 3” or so….iron again. Then unfold.Scrabble pillow (25)


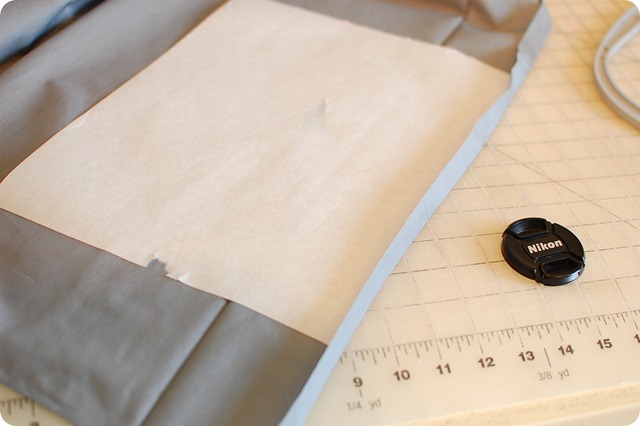
Unfold what you just ironed and place some tear away stabilizer on the back: (Do you like how I left my lens in this photo? Idiot.)
Scrabble pillow (26)
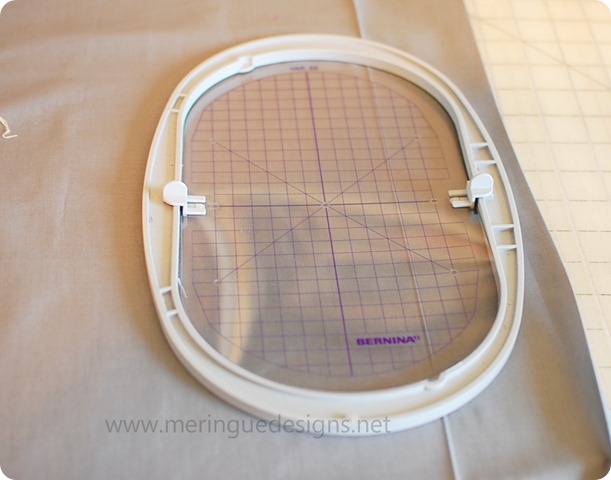
Figure out where on the cuff you want your embroidery to go. Then hoop your fabric. For this project I want the scrabble tiles to be centered on that 3 inch cuff area. Using that nice crisp edge you just ironed, and using your hoop template, line up your hoop using one of the lines on  your plastic template as a guide to go along your ironed line. Remember, the area to the right of my crease is the part that will be folded and sewn under. The embroidered area needs to be to the left of my ironed line, as seen below.
Scrabble pillow (27) copy
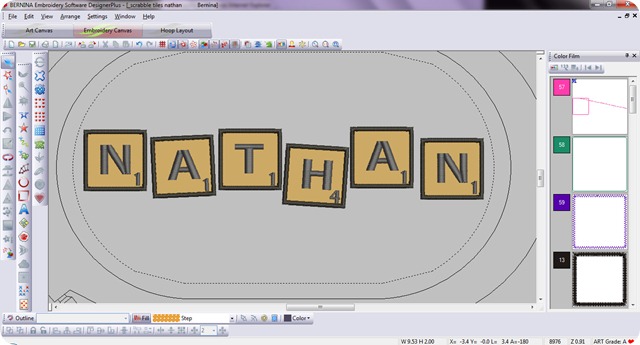
Now you need to layout your scrabble tiles on your computer. I used the small 1.5” tiles. (Poor Nathan, his name is not exactly a high-scoring name in Scrabble—only 9 points! If proper names were allowed, that is.)
I use Bernina’s Designer Plus software. I didn’t want all my tiles perfectly straight so I made a few kind of crooked:
scrabble pillow for nathan
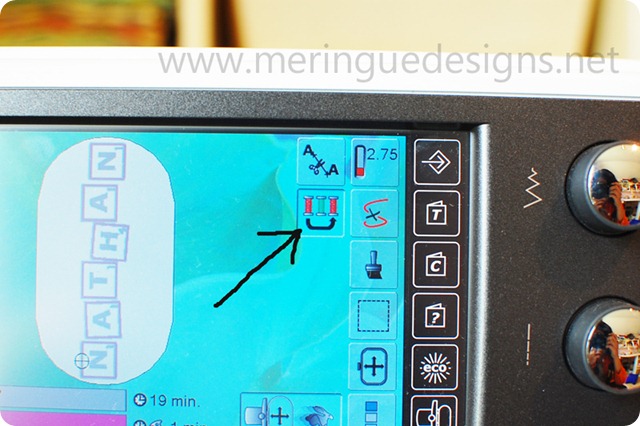
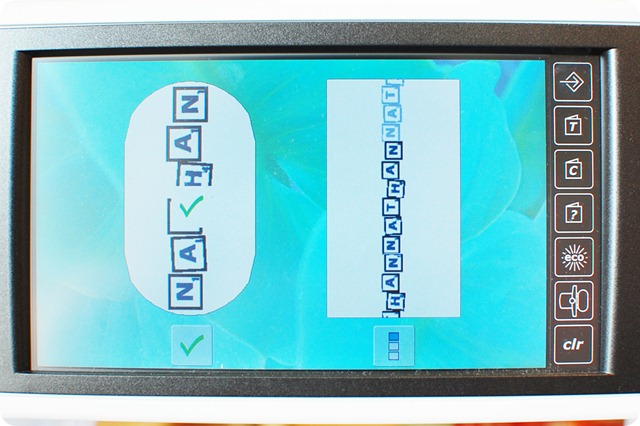
If your software or embroidery/sewing machine allows you to group all colors together, do that now. If it doesn’t have that capability, then perhaps you can just jump around through the thread colors so that you can do all the same steps for the scrabble tiles all at once.  My Bernina 830 has this nifty icon that happily saves me lots o’ time. Now I am ready to embroider and appliqué.
Scrabble pillow (9)
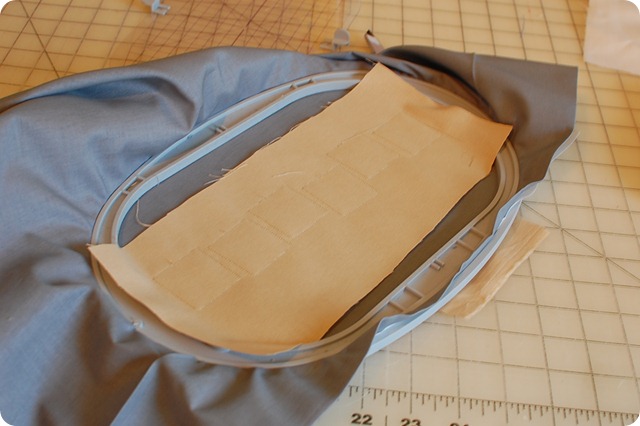
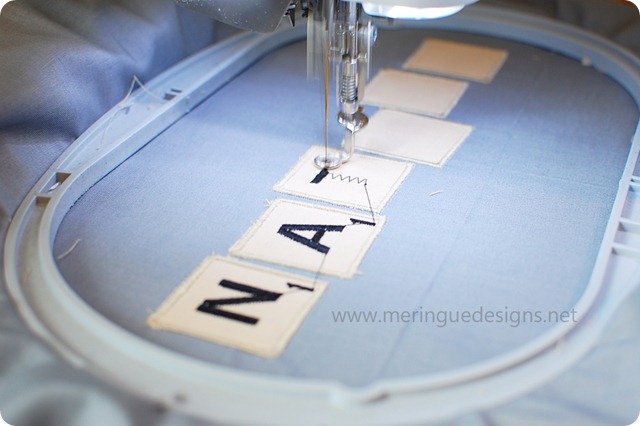
I skipped the placement line since I knew I was basically using the entire hoop this time. I starched a piece of beige cotton and then the cutting line is sewn—sorry it’s hard to see here:
Scrabble pillow (3)
Trim away the excess fabric with little applique scissors. Replace hoop in machine, finish stitching the squares. Then change colors for the letters. I went with the classic colors of Scrabble tiles—beige and black. But for a girl….think i might have to do pink or turquoise. Yum. (My Bernina 830 will cut and trim threads between jumps but on little projects I turn that feature off as I like to do it myself. The machine takes a few seconds to pause and trim between jumps which sometimes drives me nuts on these little projects.)
Scrabble pillow (7)
Done with embroidery! Un-hoop your project, tear away excess stabilizer and trim threads.
It think it is funny that each time a project is finished the machine asks me—are you really done or do you want to continue sewing this as a border? Hmmm….don’t think I love this design enough to border an entire skirt or tablecloth with it!
Scrabble pillow (8)
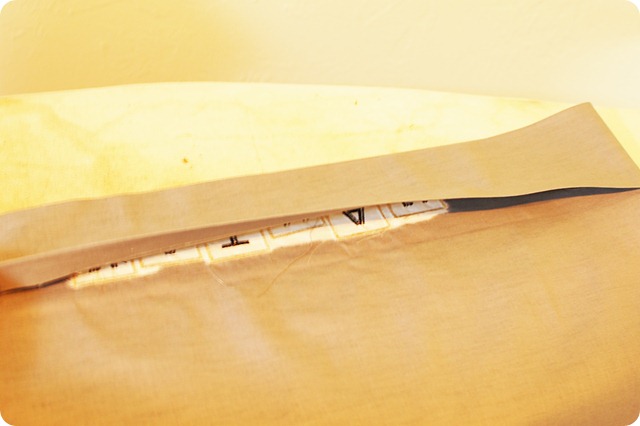
Fold pillow case right sides together and stitch the one side and the bottom closed—I just use a 1/2” seam allowance going around the selvedge—no serging/zig-zag stitch necessary to stop fraying from occuring. Serge the bottom though. Or not. Fold your previously-ironed cuff back into place, iron and pin. See how nice it is to hide your embroidery backside within the cuff?
Scrabble pillow (12)
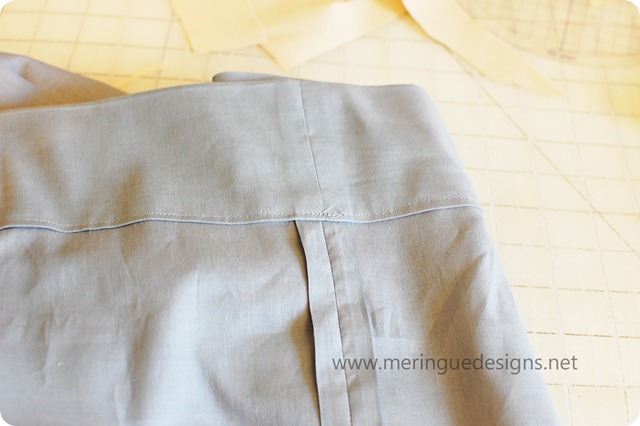
Sew cuff. See how nice it looks on the inside?
Scrabble pillow (14)
I hope my 13-yr old son loves it and consequently that he’ll become a better speller sleeping on this.
Scrabble pillow (18)

Wednesday, May 18, 2011

Favorite Fabrics for Embroidery

I get emails at least a few times a week asking me what kind of fabric is used for my embroidered pillows. Is it burlap? Is it cotton? Is it linen? Where do you buy your linen? I am flattered, really. So I hope this post helps you make some decisions.
Yes, the majority of my embroidered pillows are embroidered on 100% natural linen. I prefer a medium weight linen, around 8-10 ounces. That means that a yard of linen weighs 8oz. This weight can be difficult to find, although I have seen the 8oz. linen at http://www.fabric-store.com/ once in a while. I have always bought my 8-1o oz. linen on ebay, although this is getting harder and harder to find—at least at a decent price.
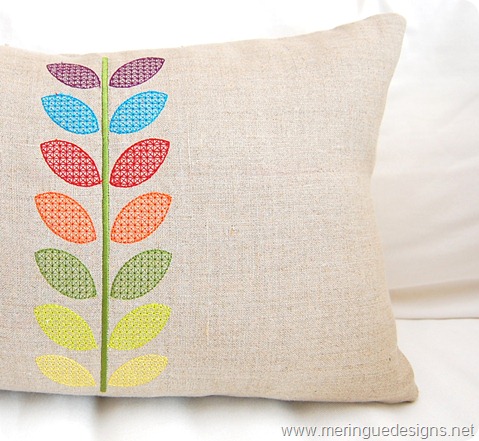
I also use a 50% coupon at Jo-Ann’s Fabrics and buy whatever oatmeal-colored linen they have on hand. I am guessing it is around 6 ounces.  While this linen is lighter weight, it embroiders beautifully. My trick is to use heavy duty spray starch to stiffen it up before embroidering. I do not wash it before hand as this makes the fabric even softer. I have washed pillows made out the Jo-Ann linen and they wash up just great even though I didn’t pre wash my fabric. I hate prewashing fabric and avoid it whenever possible. (Sewing clothing is my exception—wash first.) This technicolor vine pillow was made with the Jo-Ann linen. See that gorgeous nubby texture? That’s what I love about linen.
linen pillow sep09 011 copy
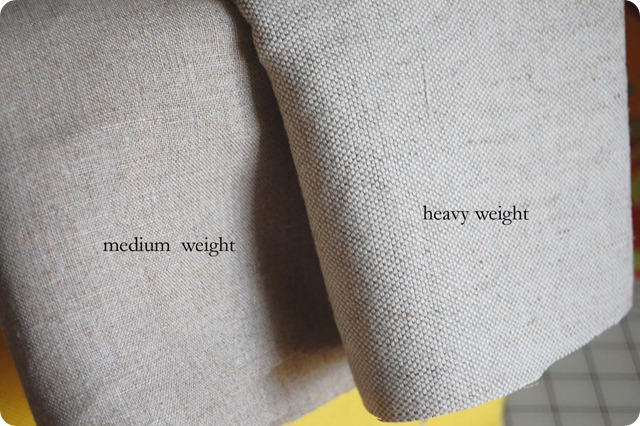
Speaking of texture, you gotta be careful. Make sure you embroider on fabrics with a tight weave. The below image shows you what I am talking about it. That heavy weight linen is too open a weave for embroidery. I found this out the hard way. (The medium weight on the left is what was used on the above pillow.) I bought 10 yards of the heavy weight linen off of ebay so I had to sell pillows not embroidered with it. I was so mad. The weave is a large open weave so my stitches looked sloppy and ‘sank’ into the waffle of the fabric. Not good.
linen-medium and heavy weight 001 copy
But I found a good use for it, like these silk trimmed pillows:
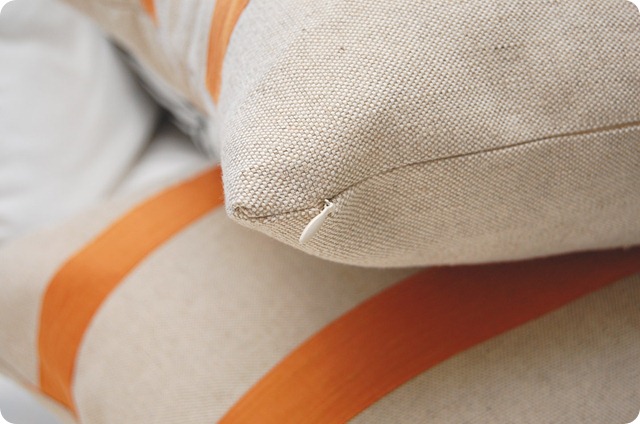
orange parallel striped pillow 004
And actually, big open weave fabrics like the above work okay on simple redwork designs. Again, here is the heavy weight linen on a purse with my poppies design. But filled designs looked awful. I wish I had a sample to show you.
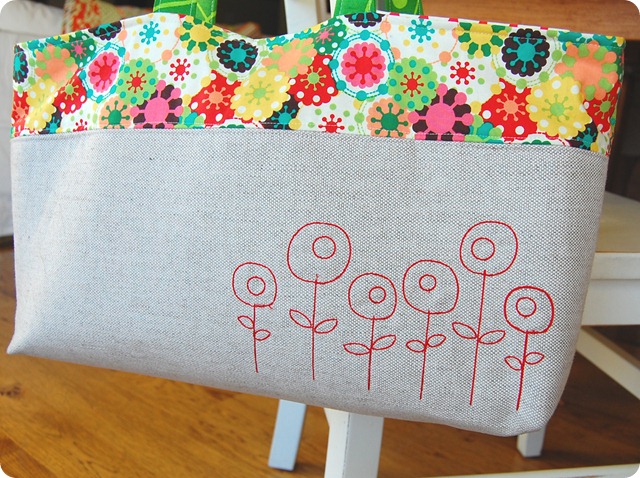
embroidery items 016
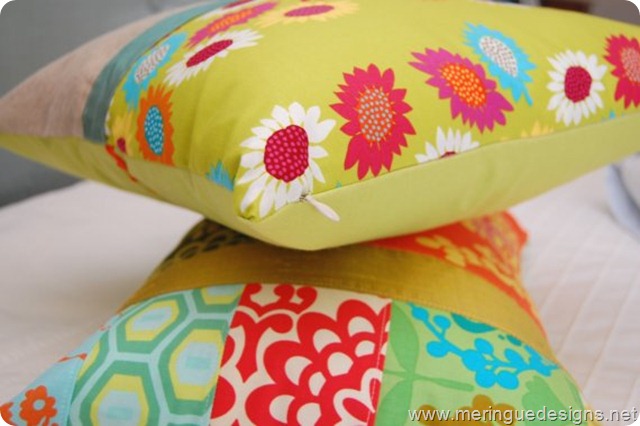
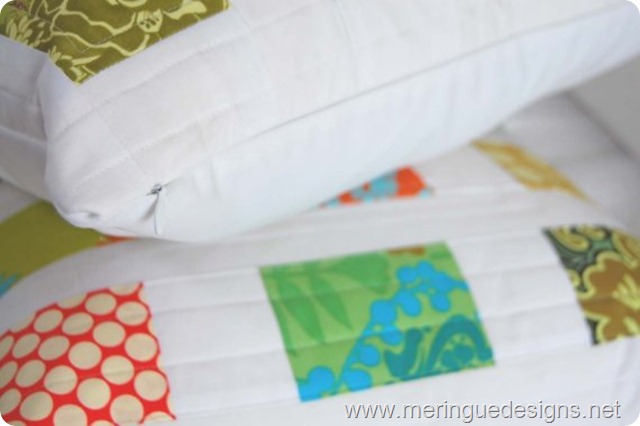
Sometimes I embroider with a cotton-linen blend, like these patchwork pillows, but I really miss that texture of the 100% linen. You just don’t have any texture here. Which was fine for these quilted pillows. And it would be fine for embroidery, just a bit one-dimensional.
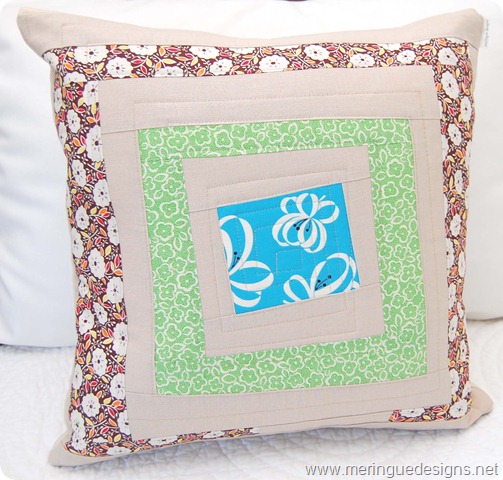
pillow made may 20 2009 006
As mentioned in the first paragraph, if you can find 8-10 oz. linen with a nice tight weave, buy it up. They have it right now at fabric.com. click here. And it’s re-orderable so I think you are in luck. Item number BV-966. I have a swatch right here with me and it’s perfect. I hate that it is $12/yd but it’s 58” wide and it goes a long way. Lovely, isn’t it on this spirograph pillow.
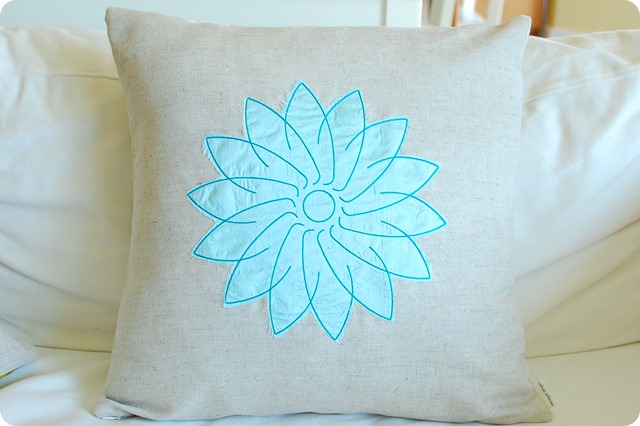
DSC_0365
And on this spirograph ovals pillow.
DSC_0527 copy
So I hope that covers the linen questions. A few words about silk now:
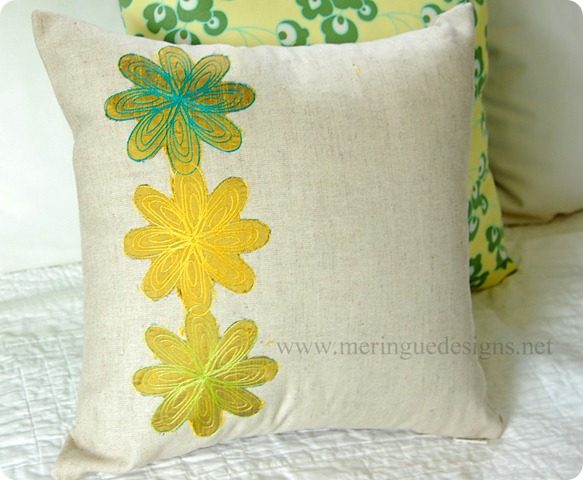
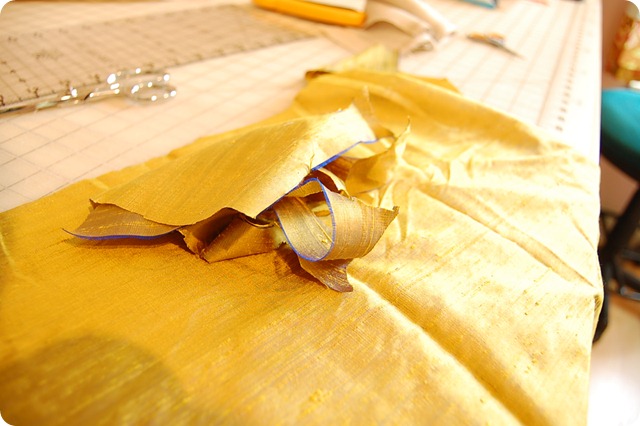
I always keep dupioni silk on hand for applique. If you’ve only ever used cotton for appliqué, you are missing out. I used an iridescent chartreuse silk on the above pillow but gave it a different look for each flower by using different colored threads for embroidery. I love everything about iridescent silk. Look at those lovely blue threads that combine with yellow to make chartreuse. Yum.
invisible zipper tutorial (22)
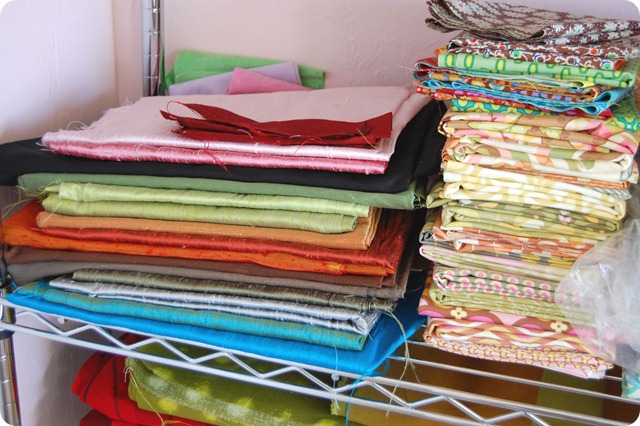
I buy my dupioni silk at fabric.com but lately I have been disappointed in their color selections, so I am not sure where to go next. Here is a sampling of my silk:
fabrics for pillows 003
Can you wash silk? For home decor I say yes. I do not wash it ahead of time and have since washed finished pillows that had silk and they look just fine. Be aware—not all silk can be spray starched prior to appliqué. It can stain. Do a test first. But if it won’t stain, that’s my favorite way to stiffen the silk for appliqué work.
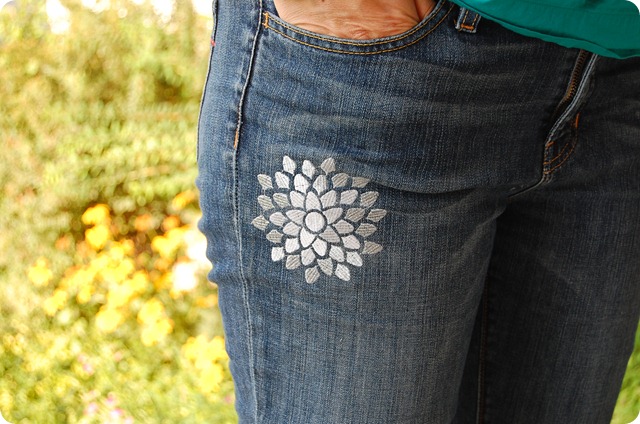
I love to embroider on denim—not just blue denim, but any twill canvas can be called denim really.  I prefer a lighter weight 6 oz denim for purses and skirts. I say that because 60z. denim is more versatile for sewing projects—great for clothing and home decor, but for embroidery projects, either light weight or heavy weight embroider just fine.  Like my jeans, obviously a heavy weight denim. Embroidered with silver metallic thread with this mum design.
embroidery items 008
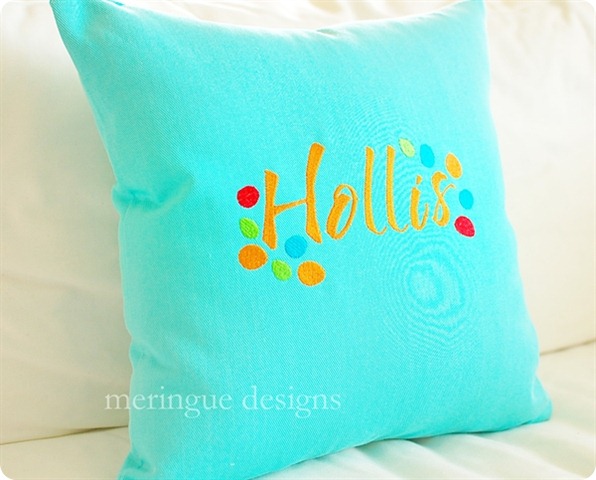
Here is a turquoise denim, super heavy weight:
new englan pillow
And a lighter weight 6 oz denim:
weekday pursse (15) copy
I love to use light weight cotton canvas as well but it is harder to find. this branches monogrammed pillow used lighter weight canvas and dupioni silk. It turned out perfectly:
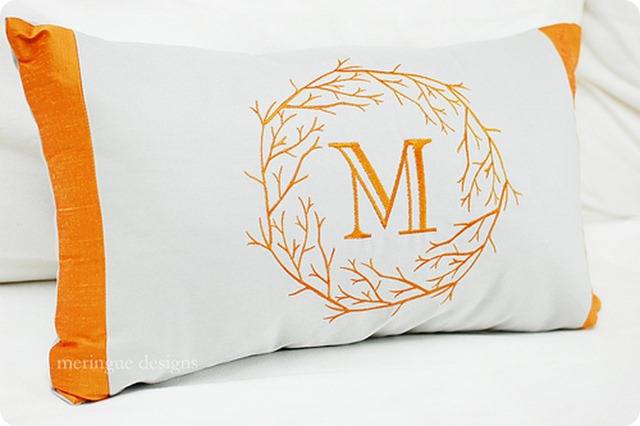
branches monogram
To sum it up: use natural fibers for embroidery and sewing—linen, denim, canvas,  and silk. Shun polyester fabrics.
Hope this helped!
cynthia logo

Monday, May 16, 2011

Scribbled Bird on Branch

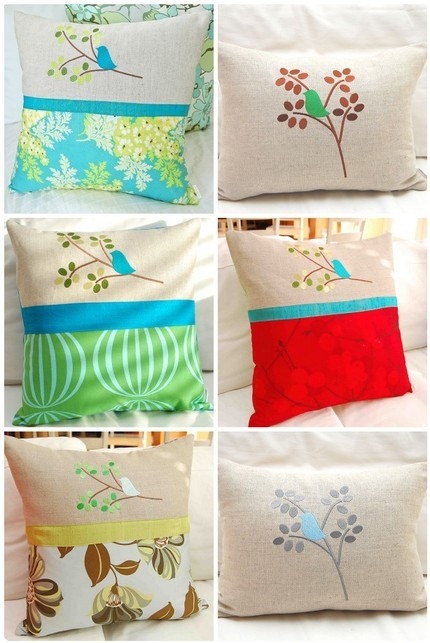
I took my best selling design—Bird on  Branch and…..
bird on branch mosaic
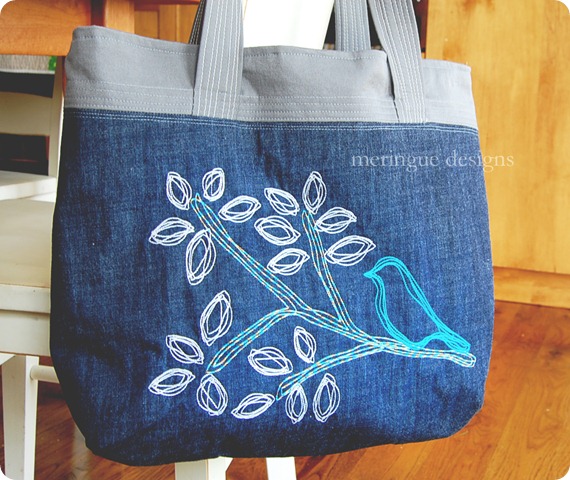
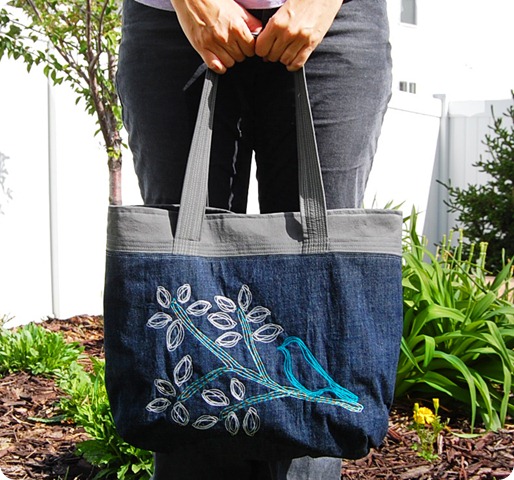
….turned into an abstract sketched design called “Scribbled Bird on Branch”. Not a very creative name, I know. But the design in creative I think.
weekday pursse (15) copy
weekday pursse (11)
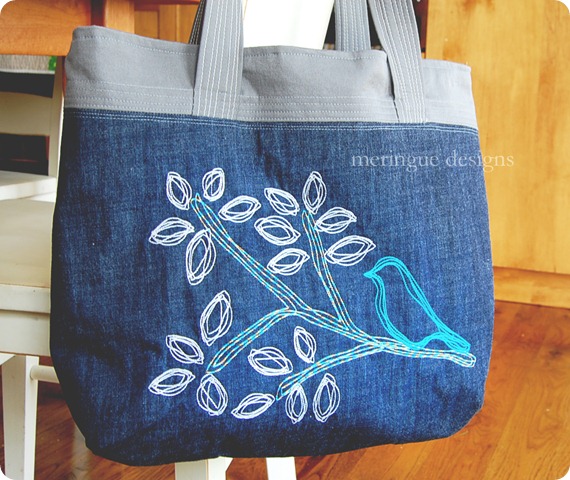
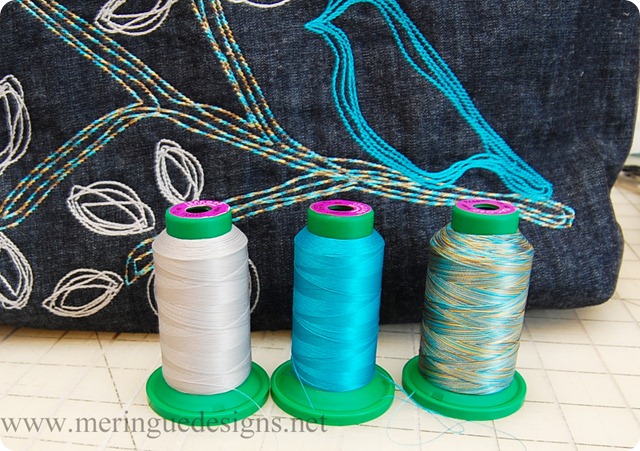
Can’t wait to put this on a pillow. Love my new purse. I used a light gray for the leaves, a bright turquoise for the bird (there’s a surprise) and this lovely new variegated brownish-gold-turquoise thread for the branches. Yummy. I can’t resist the new variegated thread colors that just came out from Isacord.
Stay tuned….the pattern for this purse is coming any day now. Check out http://www.meringuedesigns.net/ for the pattern or follow me on facebook for the latest and greatest news.
weekday pursse (20) copy
cynthia logo

Tuesday, May 10, 2011

How to install an invisible zipper & Make a Pillow

Welcome. You are about to enter the inner sanctum of the invisible zipper tutorial. For years I’ve thought about this blog post only to throw my head back and laugh my evil laugh. Broooo-ha-ha! Why? Because I made a dang good living selling pillows with perfectly installed invisible zippers on my etsy site.  Who knew you could make thousands a month selling pillows? And I ran into no other competitors that could do the same thing. (There are a few now, but none three years ago.)
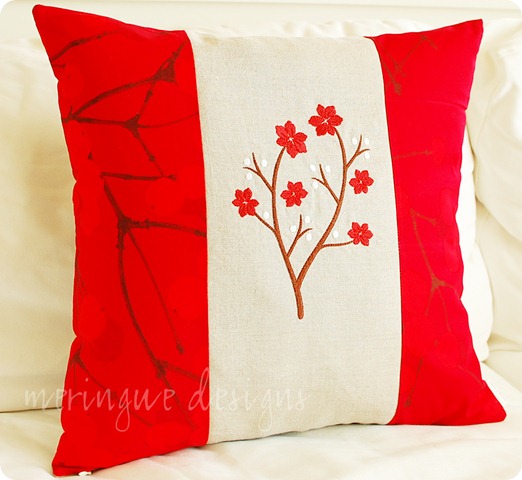
design below is Asian Branches. click here to see details of this embroidery design.

 asian branches (5) copy
Up until now I have a kept a tight lid on how to install zippers. I would get emails and conversations all the time on etsy asking me how I install them. Or rather, what pattern I used. I would quickly reply, “I am brilliant and taught myself”. Well, fabric-loving bloggy friends, I am not brilliant, just clever. And only sometimes.
What makes me an expert? Nothing really. But in looking over my inventory records I noticed I have purchased over 500 invisible zippers since 2007. So maybe installing 500 makes me an expert. Nah, you can do it too. I can install a zipper in less than 2 minutes and sew the entire pillow in 20 minutes. (Shameless bragging.) I say this in hopes that you’ll get over your fear of sewing pillows. And I know there is always a better way to install an invisible zipper than what I am about to show you—but this is how I do it.  And have done it for years. I’ve tried other methods, but always come back to this one. (Cocky)


I only sell a handful of pillows on etsy now as I have switched gears to selling embroidery designs at http://www.meringuedesigns.net/. Plus I have constant and uncontrollable pain in my arms now—but you’ll never read a blog about that because nothing is more boring than hearing about a stranger’s aches and pains. So I teach you in hopes that you’ll buy tons o’ my designs and make your own embroidered pillows.

First a little advice: You gotta have an invisible zipper foot. I used to do this with a regular zipper foot but it will not yield the same results. Invest $30 and buy foot #35. (Bernina owners) You will use it all the time for skirts, dresses and pillows. Invisible zippers are the easiest to install—much easier than a centered or lapped zipper.
Also try not to stretch the fabric as you install the zipper. I like to install my zipper on one of the sides where the fabric does stretch—against the grain line. If you install your zipper on a side with the grain line (the tight un-stretchable part) then the zipper has a tendency to looks puckered and wavy when done since there is no ‘give’ in the fabric.)

Here goes.
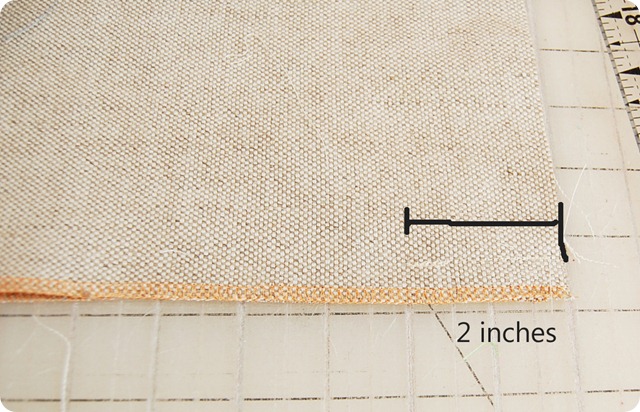
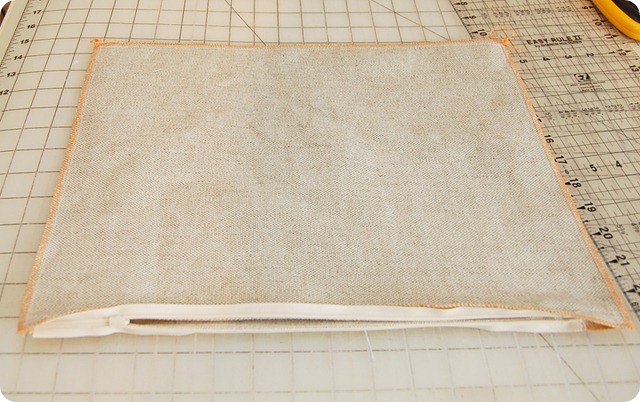
First, cut your fabric. (Any medium or light weight fabric will work. I don’t recommend invisible zippers for heavy weight or thicker fabrics like chenille and tapestry.) If you are making an 18”x18” pillow cover then cut your fabric 19”x19” or even 18 1/2” x 18 1/2”. Nothing screams homemade more than a baggy pillow with too small of a pillow insert, so don’t cut it too big! Serge or zig-zag the bottom of both halves of your fabric. (Seen in orange thread below.) Do not skip this step! The last thing you want is fabric unraveling around your zipper only to get caught as you zip up and down.


With right sides together, sew approximately 2 inches in from the edge of your fabric using a 1/2” seam allowance. Do this at both ends, back stitch really well. You will not be turning your fabric right side out at all during zipper installation. You will always be working with wrong sides facing you.
invisible zipper tutorial (21) copy
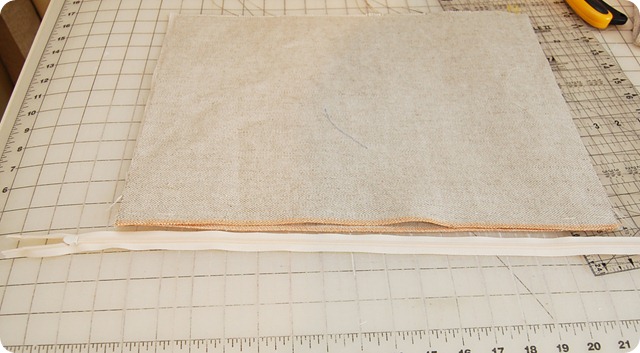
Now grab your zipper. You want a zipper that is much longer than your pillow. In this case, my pillow has been cut 19” inches but my zipper needs to be at least 21”. This zipper is around 24”. You have to be able to sew around the chunky zipper head and this is impossible with an invisible zipper foot, so buy a zipper nice and long to avoid having to go near the zipper head. (I buy my zippers from http://zipperstop.com/ and have for years. Love that site!!! I pay about 70 cents a zipper in bulk of 100+. I always buy them extra long as you’ll see why.)
invisible zipper tutorial (19)
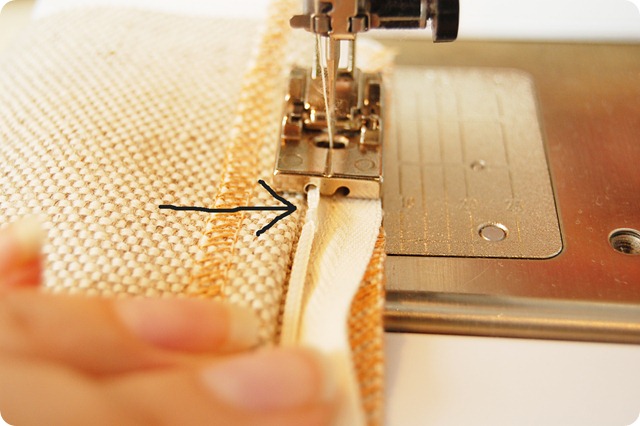
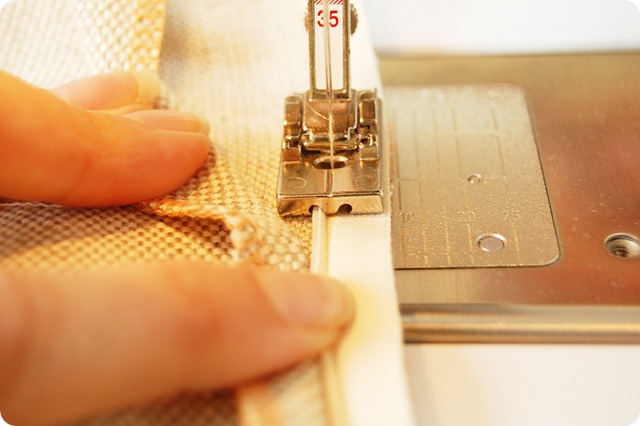
Change your foot to your invisible zipper foot now.  You do not need to move your needle over at all during this entire tutorial—your needle stays centered. Open up the invisible zipper and lay it face down. I do not iron my zipper open, I want it to stay curled up. Makes it easier to slide through the grooves of the zipper foot. The black arrow is pointing to the end of the stitching from where I already sewed it shut. This is the spot you want to place the ‘plastic-y’ part of the zipper. See photo below.  Place zipper face down under the left groove and begin sewing at the top of the zipper tape, backstitch of course.
invisible zipper tutorial (18)
Continue sewing all the way down (see below) until you get an inch or so past the point where the pillow is sewn shut.  Backstitch, remove from machine. (As you can see, I use about a 3/8” to 1/2” seam allowance. Doesn’t matter a ton. Just be somewhat consistent.) Notice how my finger kind of flattens the zipper just a little bit before it goes under the groove?
invisible zipper tutorial (17)
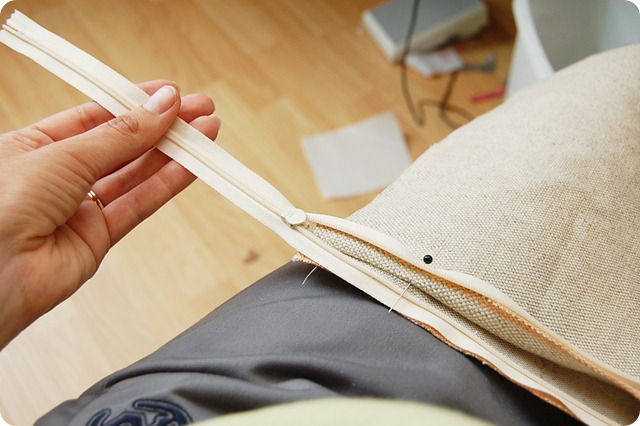
Now you’ll be sewing the other side of the zipper, starting at the other end. (I can not stand to sew with fabric to the right of me, so that’s why I start at the other end from where I began so that my fabric is always to my left. ) Zip up your zipper to within 2” inches of where your pillow is sewn shut. Pin the zipper in place—making sure there is no slack in your zipper. You want it to line up perfectly with the other side of the zipper that you  just sewed. I am not a perfectionist but this part has to be done right.
invisible zipper tutorial (14)
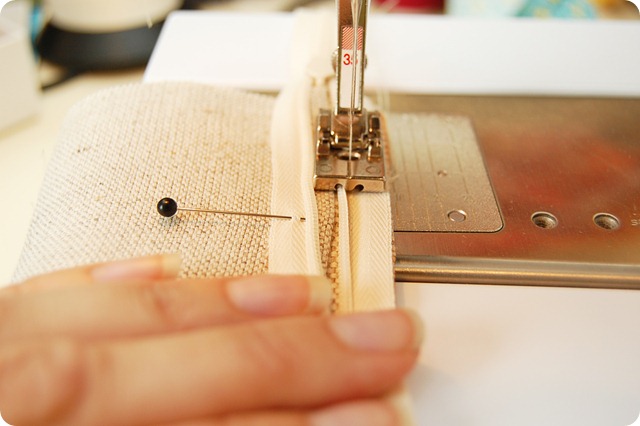
Place under your zipper foot as seen below, you’ll have to remove the pin to do this. The pin you see in this picture is just to mark where the pillow is sewn shut so that I know where to begin sewing. Start sewing an inch before your marked point, backstitch of course.
invisible zipper tutorial (13)
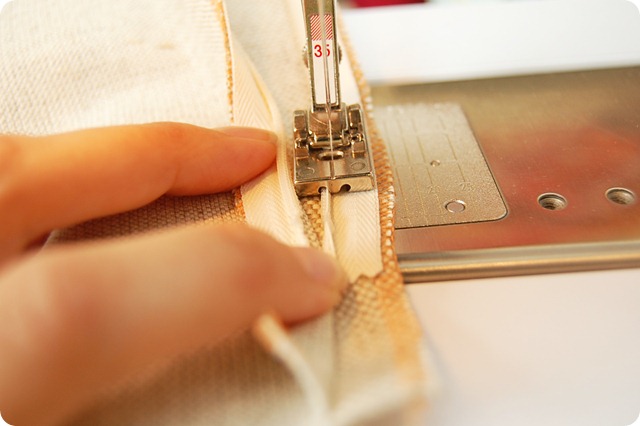
Sew all the way to the other end, ending when you run out of zipper tape, backstitch of course. Remove from machine.
invisible zipper tutorial (11)
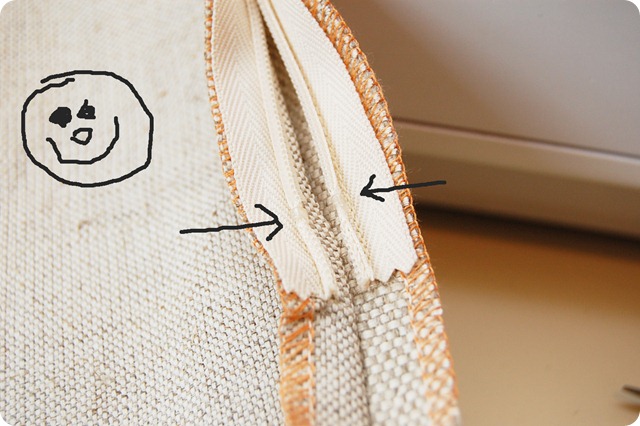
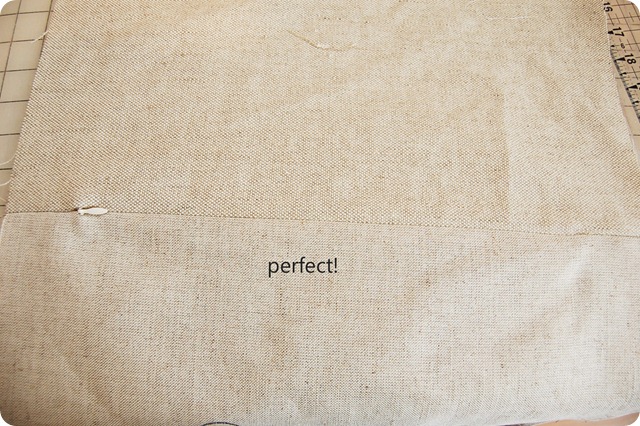
If you have done this right, the two plastic parts will meet up nearly perfectly—see black arrows.  Notice the smiley face. Pop a piece of dark chocolate in your mouth because you rock. The zipper install is done. If the plastic-y parts didn’t meet up perfectly, but within 1/2” inch of each other, no problemo. Give yourself some milk chocolate though. Clip all your threads to prevent them from zipping into the zipper.)
invisible zipper tutorial (10) copy
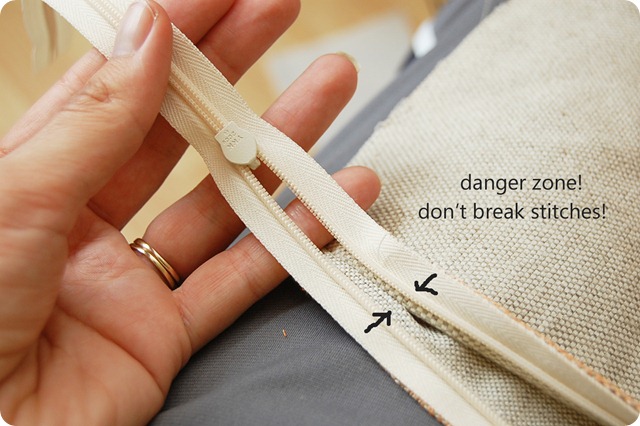
This is the part where if you are an arm-wrestling champion you need to show restraint lest you break stitches. Carefully zip up your zipper from the backside, going sloooowly past the black arrow where your pillow is sewn shut. This will be tight, especially if you are using a medium weight linen like I am. If you are using a thin quilting-weight cotton, this shouldn’t be tough.  What makes this tricky is that you are zipping from the backside of the zipper. Once you get past the danger zone, turn your pillow over, zip up all the way.
invisible zipper tutorial (9) copy
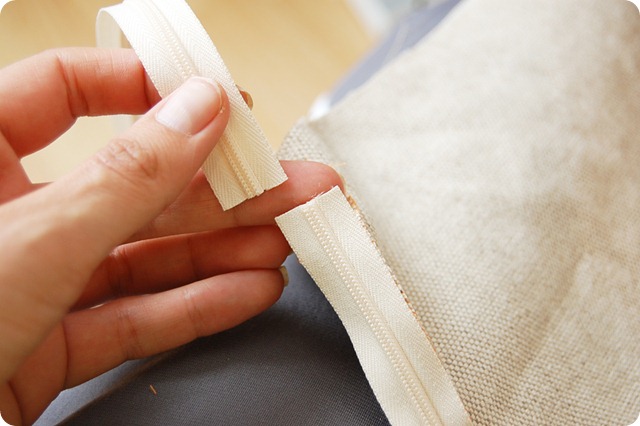
If everything looks nice, turn back over  and snip excess zipper tape away using your crappiest scissors. Or use the kids scissors. Pay back.
invisible zipper tutorial (8)
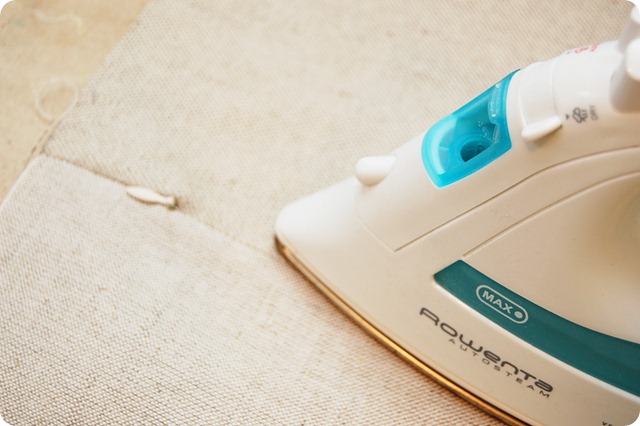
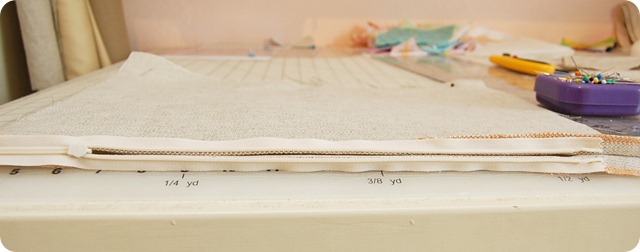
Turn over and iron flat over the zipper. Smile ‘cuz this looks wicked awesome.
invisible zipper tutorial (7)
invisible zipper tutorial (5)
Now you gotta finish the pillow. Unzip the zipper. Do not forget to unzip your zipper!!! Ask me how many pillows in the beginningI have sewn completely shut because I forgot to open up the zipper and therefore had no way to turn it right side out.  Pin the pillow shut on the three other sides. This is how it should look now.
invisible zipper tutorial (4)
Sew your 1/2” seam all the way around the 3 sides. Then serge that same 1/2” seam all the way around. You can skip the serging at this point if you’d like. I would never sell a pillow with raw seams, but if this is for your own home and you don’t care about frayed seams that you’ll never see, then eh, skip it.  My pillows have a short life span in my home (too many ideas in my head!) so I live dangerously and rarely serge the edges off. They just don’t have time in my home to fall apart. If you don’t serge the edges, clip the corners though. But if you’ll be washing this pillow cover a lot because your kids and animals are pigs, serge away.
invisible zipper tutorial (3)
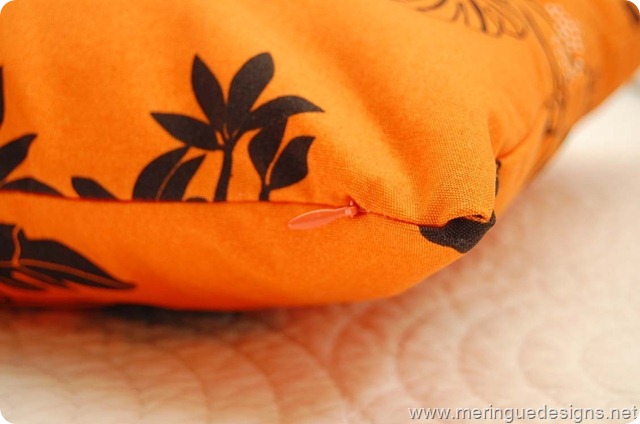
Fill with a plump 18” or 20” pillow form. And admire your brilliance. (Sorry for the overexposed photo.)
DSC_0529
Works just as well with an orange zipper on orange canvas.
invisible zipper install
Or with lightweight cottons on the top and canvas on the bottom.
invisible zipper install 2
I’ve even done this on quilted pillows (below) that contained a layer of cotton batting. If you opt to do this though, move your needle one notch to the right to accommodate the bulk. Zipper won’t be as “invisible” as the above samples, but good enough.
invisible zipper install 3
Did you learn something? I sure hope so because this took 2 hours to write. (*brushes back of hand across forehead*)
cynthia logo

LinkWithin

Related Posts Plugin for WordPress, Blogger...