Wednesday, July 27, 2011

Picnic Quilt

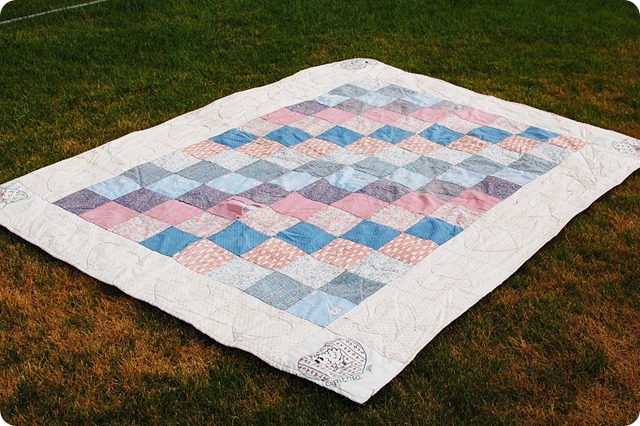
I was 17 years old in 1991. That was year I made my first quilt. I knew nothing about quilting, but luckily I had a fabulous Young Women leader from church, Keike, who became much more to me than just a church leader. She and I just talked on the phone yesterday. Love having friends through the years….

Anyway, I needed to complete  a ‘Personal Progress’ project to eventually complete my Young  Woman Recognition award. That’s an award that is similar (although not really) to a boy earning his Eagle Scout.  I wanted to make a quilt, and since projects then had to take more than 20 hours each, I knew making a quilt would be perfect. Being a teenager, I lacked commitment to finish this project, so in stepped Keike. (Bless you Keike!)

old picnic quilt (4)

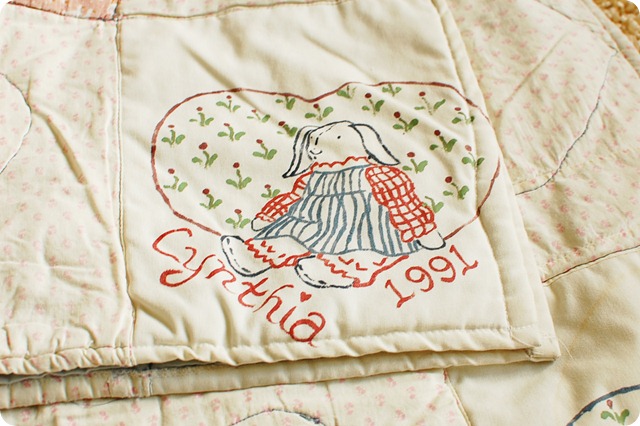
The summer before my senior year of high school I stayed with Keike’s family in Portland, Oregon. (Can you believe they moved away from California by choice? Crazy!) We made that quilt. And trust me, it was very stylish back then. Filled will soft blues, dusty rose, and plenty of references to farm animals. It was like, yea, so completely 1990s. (Repeat last sentence in Valley Girl.)

How cute is the bunny painted with simple acyrlic craft paint?

old picnic quilt (1)

old picnic quilt (2) 

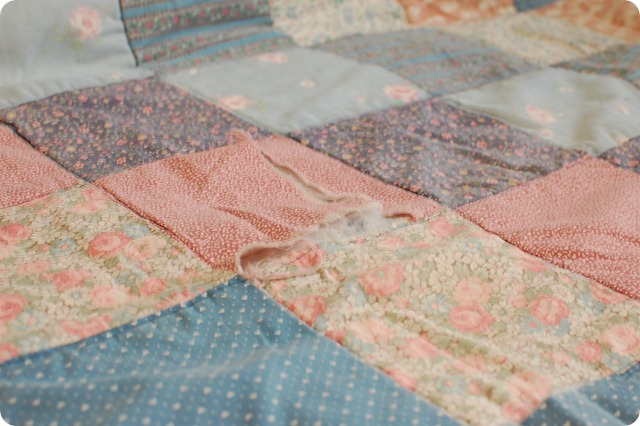
It is now literally falling apart. I’ve fixed so many of the seams, but this quilt has fulfilled it’s blanket destiny.

It’s time to retire it before it literally falls to more shreds.

old picnic quilt (6)

Over the last twenty years, this quilt has been so loved. It was on my dorm-room bed in college for a few years. After that, it became our picnic quilt once we had a family. For years I have toted this quilt around in the trunk of my car to make happy babies and Mom comfy at the park. (I know, the nostalgia is dripping in this post!)

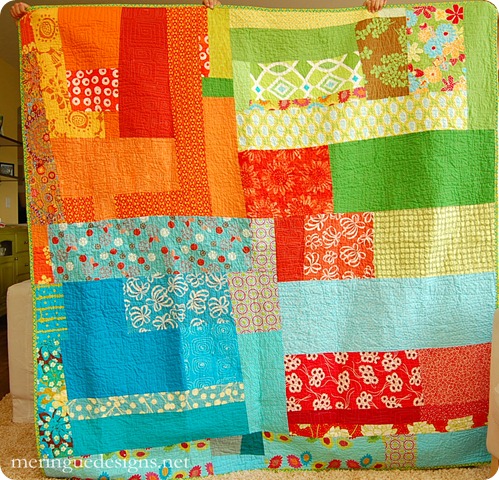
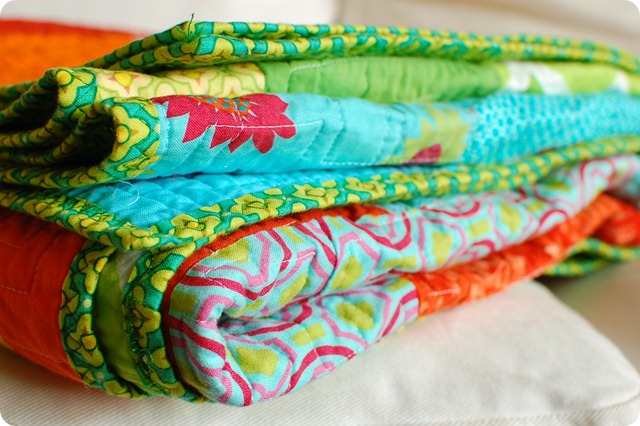
So fast forward from 1991 to 2011. After 20 years, it was time for a new quilt.

picnic quilt starting

picnic quilt (9) copy

This is the back:

picnic quilt (8)

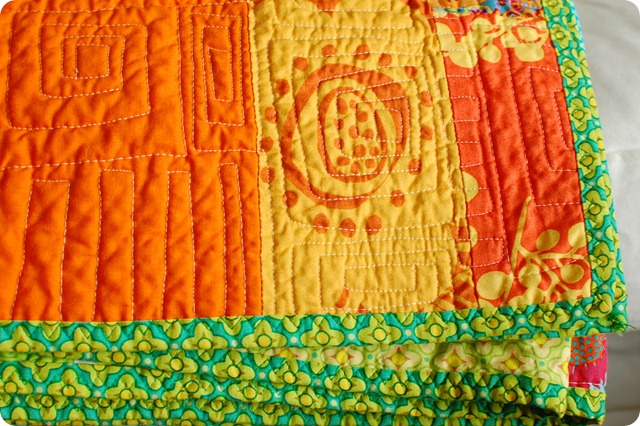
This is the binding—sewn on with a modfied zig-zag. Too lazy to hand sew binding like real quilters. Snoozer.

picnic quilt (2)

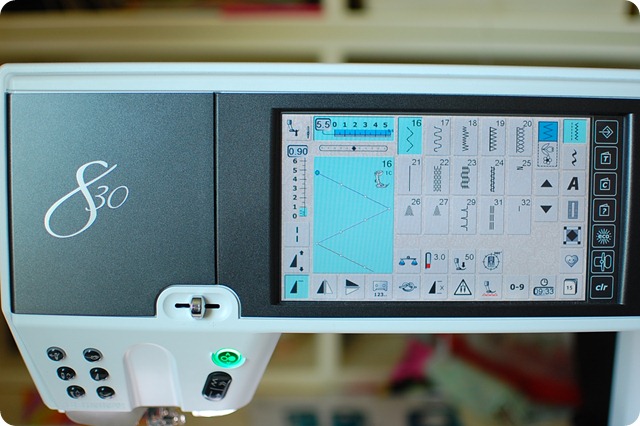
I love stitch 16 on the Bernina 830 for attaching bindings to pillows and quilts. Perfect for lazy quilters. That would be me.

DSC_0814 

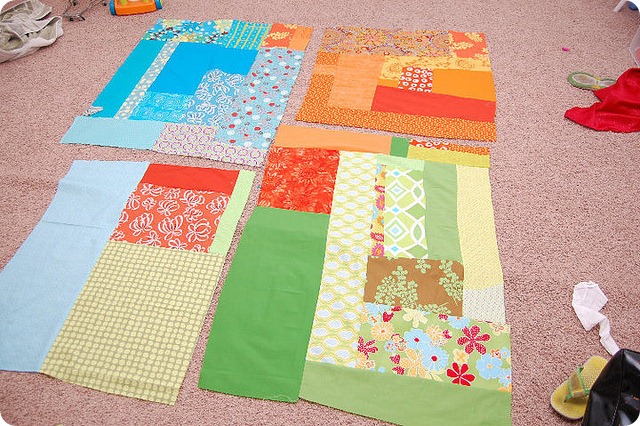
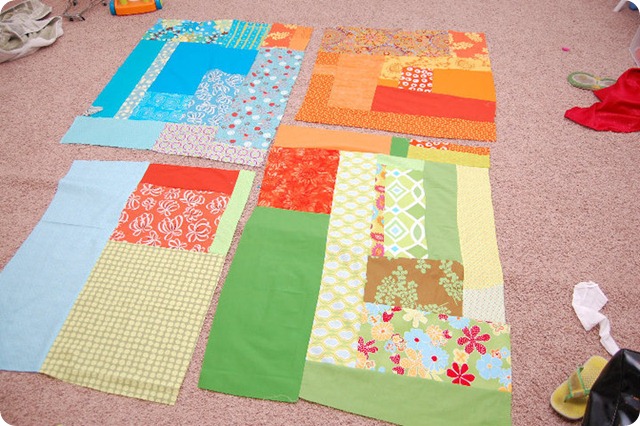
Yup, my new picnic quilt is just a bunch of scrappies. No pattern was used because well….I just can’t be bothered with patterns. Time is not on my side these days and without anyone to help me make this quilt, I was left to my own devices.

I used a random funky-squares  to free hand embroider. That dang quilting took so long. Thank goodness I used my BSR (Bernina Stitch Regulator) so that all my stitching lines are exactly 2.5mm. Love technology.

picnic quilt (7)

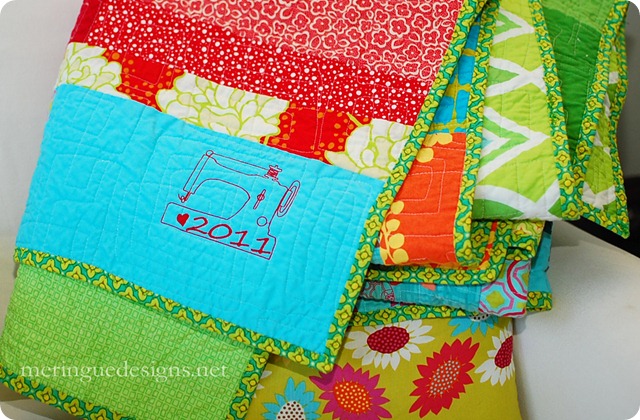
And this time the year was added with machine embroidery, not acrylic paints. That’s my antique sewing machine design. I just added the heart and year. Clever, huh?

picnic quilt 10

picnic quilt (3)

picnic quilt in progress


I’ve decided I love quilts, but I don’t love quilting. Too much repetitive sewing for my taste. The above picture was take 9 months ago—that’s how long it took me to finish this ultra-simple and wacky quilt.

So here’s to another twenty years before I need another picnic quilt.

Check back in 2031.

Tuesday, July 26, 2011

Refusing to Raise Idiots

If my kids grow up to be idiots, well, it won’t be my fault. I am a mean mom and force my kids to ‘learn’ and ‘appreciate’ things that otherwise they would simply ignore. I honestly believe that my 13-yr. old has no interest in doing anything that isn’t purely entertainment and that requires more than just a handful of brain cells. Tough.

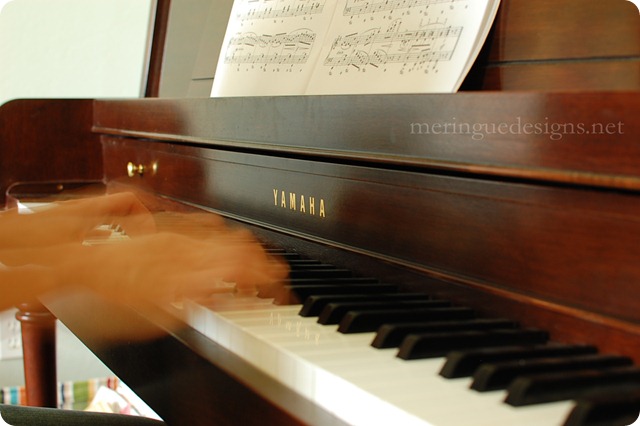
Because I believe that learning musical instruments is beneficial to the brain, makes them well rounded, and teaches children discipline, I make them take piano lessons. (Ok, so those are my hands on the piano, but that’s because once again I am taking lessons too.) And if they grow up to hate music of any substance, well it wasn’t my fault.

 piano (11) copy

Because I believe kids should never eat hamburger helper and rarely, if at all, eat anything made under golden arches (smiling stars are ok though), I force my kids to try food like arugula and curry. It’s more than just good nutrition I want them to emulate—I want them to appreciate different cultures, and food is the best way I know how to do that. Not only do they have to try these foods, they have to cook with me as well. If they grow up to hate vegetables, well, once again, it' wasn’t because I didn’t try. Here’s Nathan cooking some Tikka Masala:

nathan cooking

And because I believe God loves us (we are his children), Jesus Christ is my Savior,  and has given us a plan to guide our lives, I make my kids go to church. We pray together everyday, we read from the scriptures nearly everyday, and do our best to follow the commandments. I believe these things add value and meaning to our life. Will my kids agree someday when they are adults? I sure hope so. But once again, if they choose to abandon our  faith, it wasn’t because we didn’t try. (Disclaimer: I do NOT believe you are an idiot if you are not religious. These are just my own personal values.) Here we are at the temple in Laie, Hawaii:

hawaii temple

I correct their grammar, refuse to let them say “like” too much, and make them scrub toilets and dust around the house. But hey, in 20 years, there just might be three more adults in society who go into therapy because,  lo and behold, it turns out, they had an idiot for a mother.

I’m ok with that.

Friday, July 22, 2011

How to Make Roman Shades part 2

Part 1 can be read here.

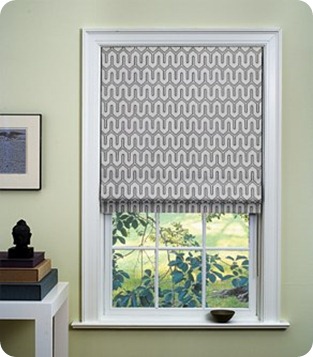
roman shades for guest room2 (3)

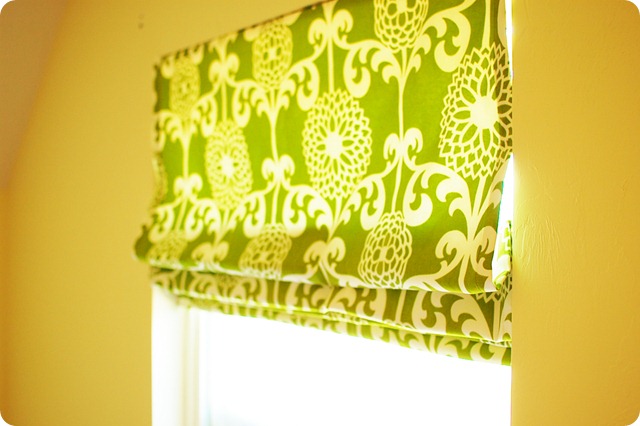
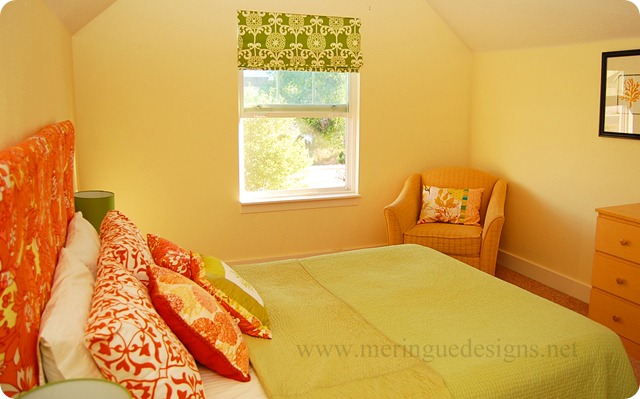
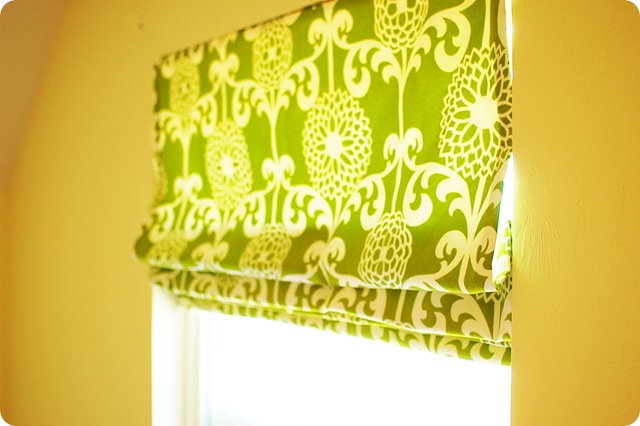
This post will show you how to make a Roman Shade for an inside mount. Meaning, the shade will sit inside of your window frame. Most of the sewing details are the same and can be found in part 1, but some are different. Here goes!

My window is 41” side so I want my shade exactly 41” wide for the finished width. When I was a beginner I used to make the shade 1” narrower than my window so that it fit perfectly inside my window frame. However, the problem with that is that if your shade isn’t perfectly straight you will see it hang crooked once it is installed. We are amateurs after all, right? I have made that mistake many times, which isn’t a huge deal since your shades are mostly pulled up, but trust me, make them the exact width of your window to achieve near perfect results.

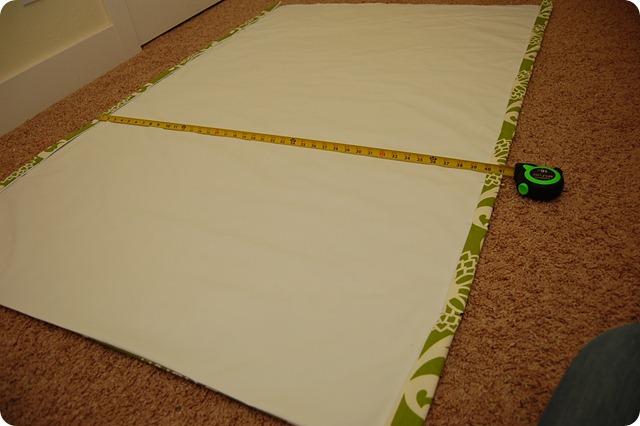
Use to tape measure to measure every inch of the way up and down your shade to acheive the exact width of your window. Normally, the sides seams are about 1 1/2 inches, but I had to adjust the pins as necessary to get the exact measurement of 41”. Then sew. Again, this is all explained in my first post.

roman shades in guest room (5)

The length of your finished shade will be the same as my previous post.

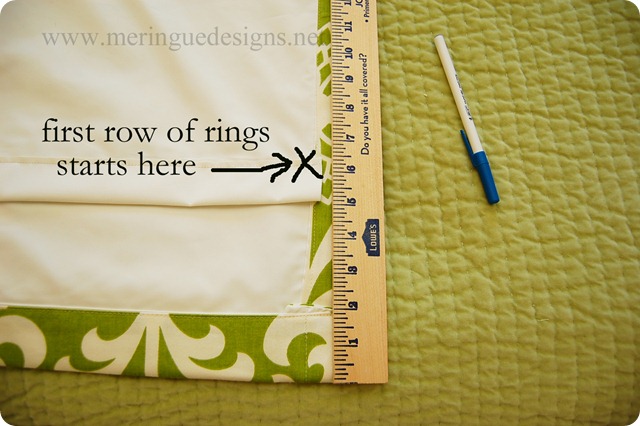
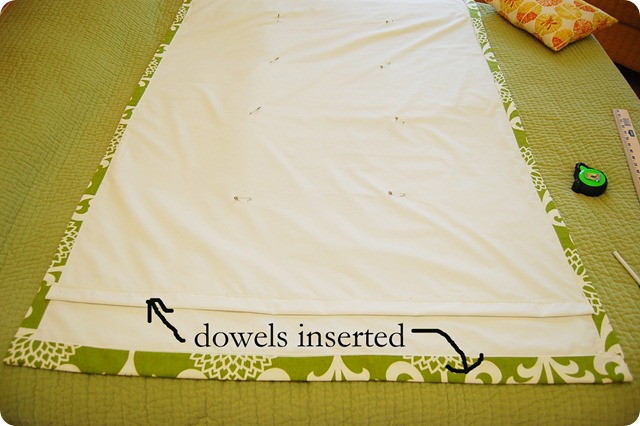
For this shade though I am not starting my rings at the very bottom of the shade. I am starting them a bit higher up so that the bottom section doesn’t get sun bleached by the sun when in the raised position. You will need to make a dowel pocket out of leftover lining. I used black out lining which is kind of ‘plastic-y’ and it doesn’t ravel, so I cut a strip 3” wide, folded it in half and sewed it 6 1/2” from the bottom.  Obviously, don’t sew the sides shut or you won’t be able to get the dowel in you moron.

Why 6 1/2” inches up from the bottom? Patience grasshopper.

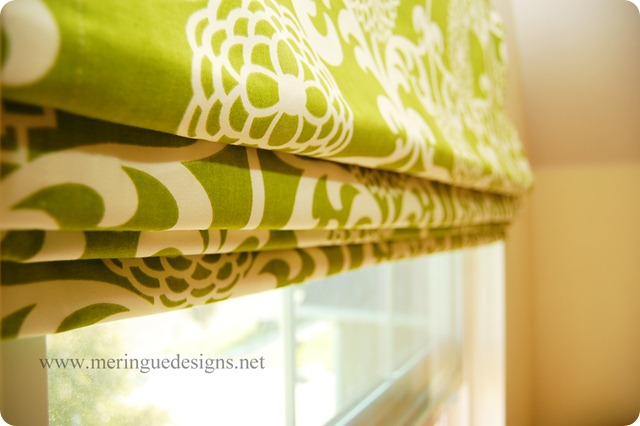
Here’s the math. My rows of rings will once again be spaced 10”, which means I will have 5” pleats when pulled up. So if I want to see about an inch of the very bottom of the shade when it is pulled up I need to add about 1 1/2” to the to 5” to get the the point at which I want my rings to start. Consequently, you will need two dowels. (Hey, 7/16” inch dowels are only $1.24 at Lowes, so don’t be cheap.)

roman shades in guest room (10)

 roman shades in guest room (8)

Attach your rings the same as part 1, either by hand or by using the button sew-on feature on your sewing machine.

Staple your shade to your 1x2 board. You’ll notice my board is just raw wood this time. On my outside mount shade I wrapped the 1x2 in fabric because it would show otherwise. Here it will not show so I don’t care. I have seen professionally installed roman shades and they usually paint the 1x2 to match the inside of the window, but I can’t be bothered. Hence, raw wood.

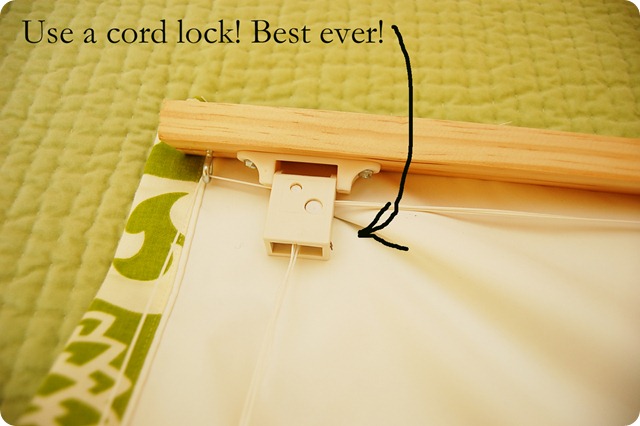
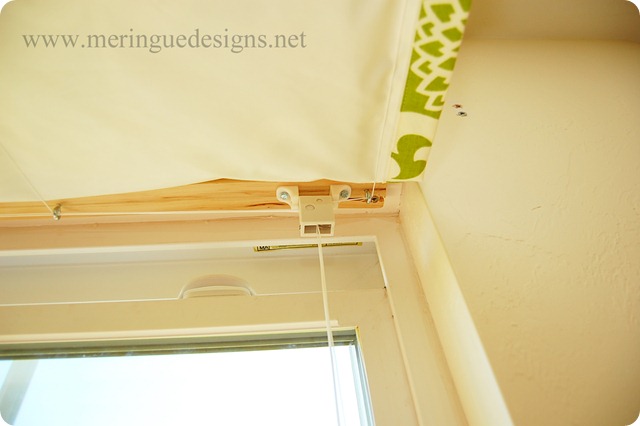
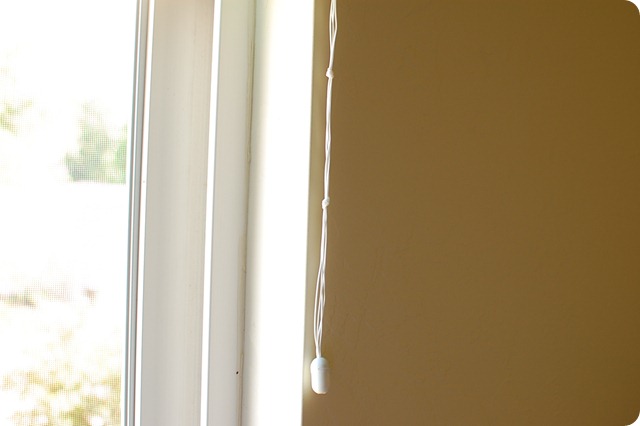
Attach your ring eyes and if you want the best roman shade ever use a cord lock!! Cord locks can be found at draperysewingsupplies.com.  What a cord lock does is allow your roman shade to be pulled up and down like mini blinds. Meaning, they will lock into place just by pulling them to right, and pulling to the left releases them. BRILLIANT!!! Totally worth the $9. As a side note, I have to just rave about Drapery Sewing Supplies.com because they sell really high quality products to make roman shades and they have videos to show you how to use the items. I never would’ve figured out the cord lock on my own, but thankfully the video explained it P-E-R-F-E-C-T-L-Y. Their nylon cord is superior to the crap at Joann Fabrics. (See below photo to understand how crappy the nylon cord is I use from Joann.)

And if you use the cord lock you don’t need the wall cleat anymore. But you can still use a cleat just to keep the cords all nice and gathered. (The roman shade in the below photo is 5 years old, hence the dirty dingy falling-apart string.)

DSC_0793

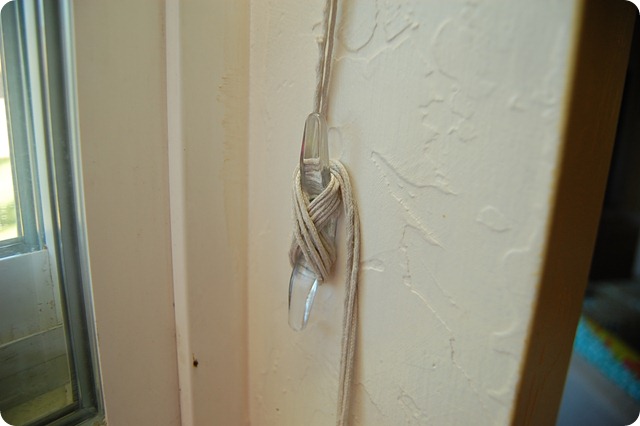
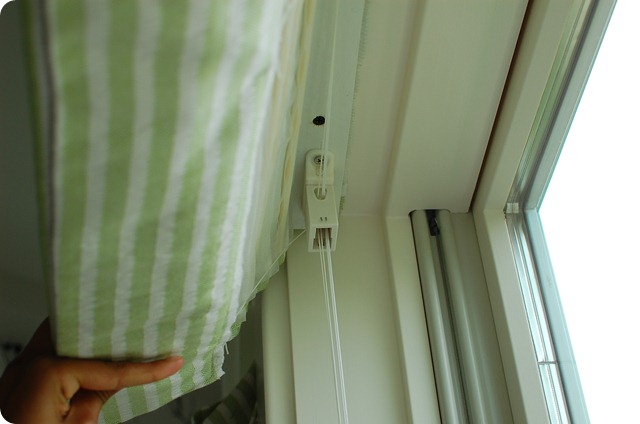
The only way I knew about the cord lock was that I went and toured this amazing gorgeous home for the Utah Valley Parade of Homes and noticed all the gorgeous roman shades at every window in this house. I lifted up the blinds and saw the cord lock, and of course snapped this  photo below because I was on a hunt to figure out where that little contraption came from. Bless you Google search. (Noticed the 1x2 is just painted? Awesome!)

parde of homes (17)

roman shades in guest room (12)

And instead of tying knots at the bottom row of rings, I now use these little orbs instead. Makes pulling up your installed shade with perfectly even rows much easier because you don’t have to untie the knots to get them even anymore. About $1 each. Worth it. But definitely optional.

All ready to be installed! (I have the shade obviously in the pulled-up position.)

roman shades in guest room (11)

You’ll need another helper to install them. For this 41” wide window 3 screws, 2.5” long is all that was needed. Woops, you can see how the board split on the right side.

roman shades in guest room (24)

I think my guests will never wanna leave now that they have black-out lined roman shades to keep out the glaring light of the street lamp just outside this window. (Thanks Provo city. Actually, I do like that light, great for security.)

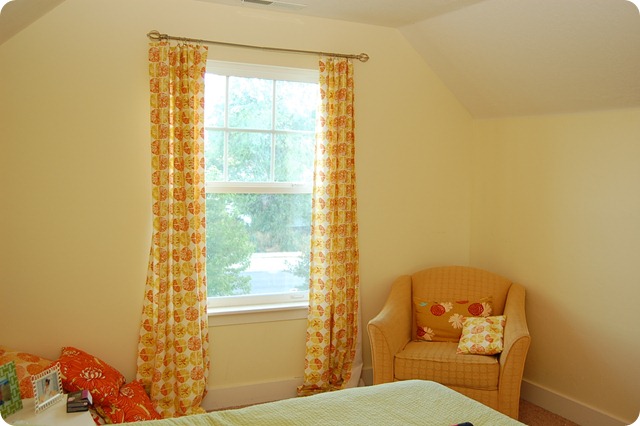
Before (These gorgeous curtains were too long (heaven forbid I hem them) and never made for this window—they used to hang in my office and are now for sale for $40. Contact me!)

roman shades in guest room (15)

After!

roman shades in guest room (21)

roman shades for guest room2 (3)roman shades in guest room (23)

roman shades for guest room2 (1)

roman shades in guest room (17)

Breakdown of project cost:

fabric: Waverly Print from Joann $10, Blackout lining, $6, Rings $1.50, dowels and board $4, Orbs $4, 0.9 mm Nylon Cording $3, Screw Eyes $2, Cord lock $9, Cord condensor (for the end of the strings) $1. Most supplies purchased here.
TOTAL $40.50 AND 3 HOURS OF MY TIME.

Not bad compared to $350 for these shades at The Shade Store.

1647-400

Thursday, July 14, 2011

Nikon D40

Before I start this post, can I just say I am a photography idiot. I’ve never taken a class, and by my brother’s standards (a true professional) the lenses I have are crap. Those are his exact words. (My lenses cost $150, his cost $2,000.) He does plenty of photo shoots for me and family as well. Click here or here.

I own a Nikon D40. They don’t even make that camera anymore, but I’m sure there is a low-end equivalent SLR that kenrockwell would recommend. Ken is the one who recommended the Nikon D40 and is the reason I bought mine. I’ve loved mine for 3 years now. Here I am loving my camera a few months ago on Ala Moana beach on Oahu, Hawaii. I didn’t go too deep in the water to take photos of my kids because I was afraid I’d fall and ruin it. Or that my youngest who is always hanging on me, would splash me. (See next photo)

Hawaii Trip 194

Here I am snapping away at Pearl Harbor. My D40 goes everywhere with me. (Notice my 7-yr old pokin and proddin me!)

Hawaii Trip 151

Hawaii Trip 145

Now having said that I am a photography idiot, I do make a nice chunk o’change each month selling items on etsy and my own website that I photograph myself. (More on my etsy sales in a minute.) All that I have learned I’ve learned from my dad (a photography hobbyist), my pro bro, and websites that feature tutorials like iheartfaces and pioneer woman and kenrockwell. There is a lot of great info on those websites—spend some time on them and you’ll learn lots.

Also, you gotta learn to use Photoshop to touch up your photos. I only have the dummied down version of Photoshop, called Photoshop Elements, which is about $79 buck-a-roos at Costco. I learned lots about Photoshop just by going to YouTube and searching “Photoshop Elements tutorials”.

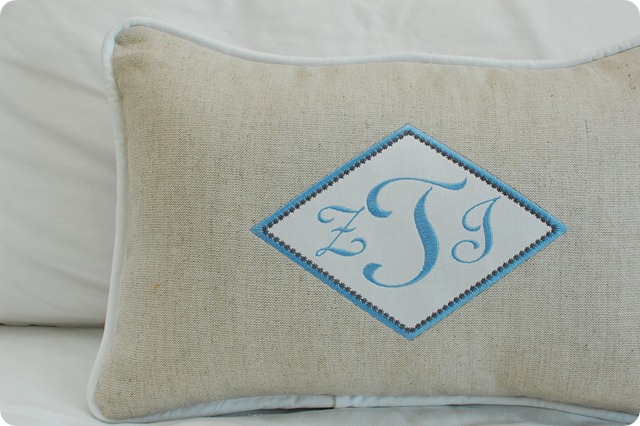
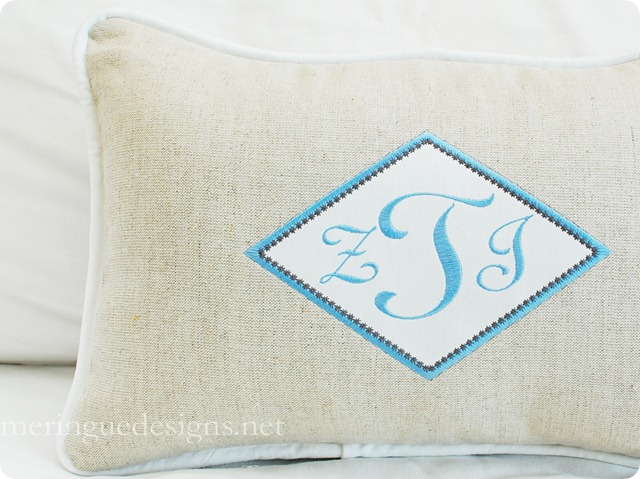
Here are some examples from a pillow I just made this week: I used my newest design called Wedding Diamonds applique for the embroidery portion. This pillow will be for a happy couple that I’ve never met. More specificially, it is for my husband’s co-worker’s daughter. I hope they love it!

Anyway, the following photo was taken with the same lens the camera came with (18-55mm) with a bounce flash, it is straight out of the camera, no editing. (The benefits of bounce flash vs. regular pop-up flashes can be found here.)

diamond applique (3)

It’s not too bad, but It still needed more light. So in Photoshop I brightened it and added a little bit more contrast. That’s it—maybe 30 seconds of work. Ready for the web. (Oh and I always add a watermark because I’ve run across my photos splattered on others’ blogs, facebook pages, and websites. (Which is ok if they ask my permission, but I just want others to know that this ain’t their work—it’s mine.)

diamond applique (3) website watermark

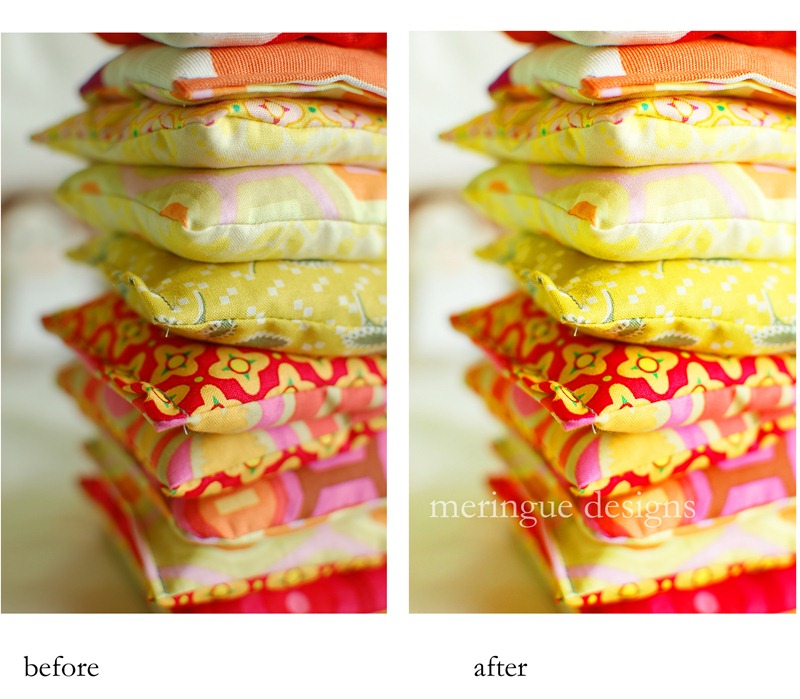
My favorite way to photograph when I want my light natural-looking is to use my 35mm fixed lens without any flash. I love how I can get great macro (close-ups) shots with it, like this photo below. You can see every tiny details—including the threads I still need to clip!

bean bags 

The editing on the above photo is pretty simple—brighten a bit and saturate colors. I love the soft shadows on the left  hand side of the bean bags. You can tell the light source (a giant window) is coming from the right.  Photo details: aperture f/2.5 (that’s what is makes all nice and blurry everywhere but where I am focusing), ISO 200, shutter speed 1/60.

I really think if you are going to sell items on a website you MUST take great close ups because your customer wants to (and needs to) see the quality of your work.

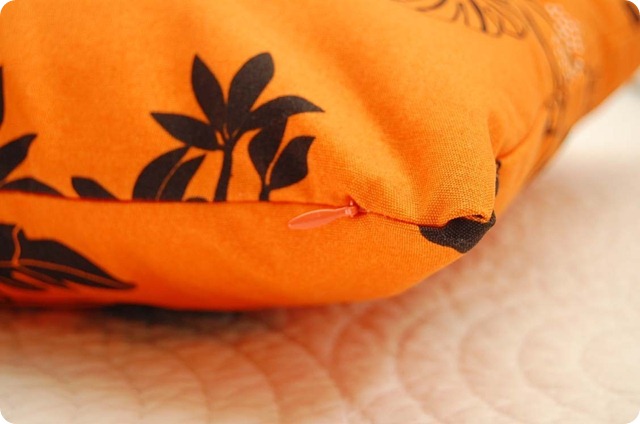
In this photo I want my customer to see how awesome my invisible zippers are installed:

invisible zipper install

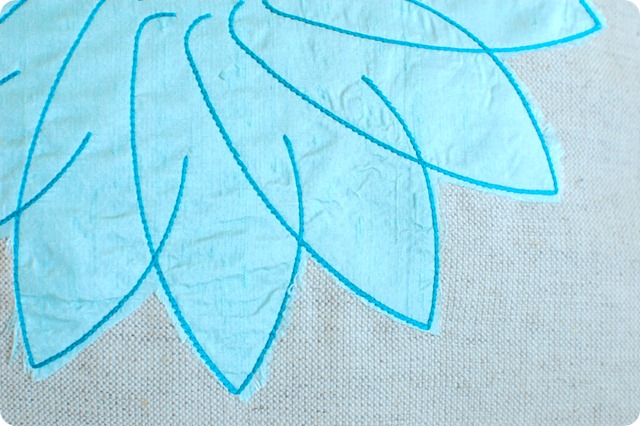
In this photo I want my embroidery customer to see the detail of my embroidered designs. I want her to see the nice thick backstitching I used to design my Spirograph  Daisy applique. It’s all in the details.

spirograph daisy (6)

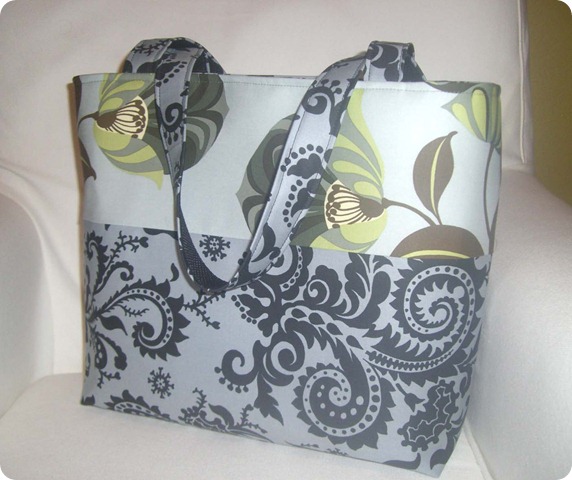
When I first started selling on etsy, the first 8 months or so, I took photos like this:

nigella bag two prints

I am nearly embarrassed to post the above photo. It’s foggy and dull. Who would buy that purse? It’s a terrible photo. But miracle of miracles, I was grossing around $800 a month on etsy. I bought my Nikon D40 in April of 2008 and my sales doubled to $1600 the very next month. IN JUST ONE MONTH! Because of my photos! No other changes!

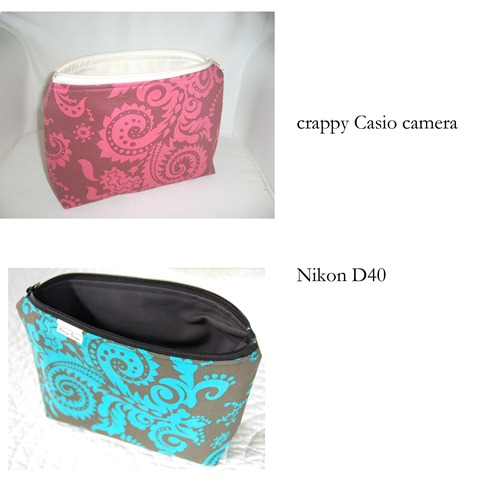
So does your camera and skill level make a difference? You bet. Just look at the this photo:

cosmetic bags

It doesn’t matter how well you sew or how gorgeous your embroidery work is. If you have crap photos, you’ll have crap sales. Invest some money and photography know how in your business, and you’ll be a success. I am proof of that.  I am really proud of the success I’ve had in my business. First and foremost, I work my fingers to the bone. I’ll get up at 4am to sew. And for my embroidery designs I spend hours designing on the computer, then more time stitching out samples, and finally, a good amount of time photographing my work. Running your own business is not a an easy thing. But hard work always pays off.

cynthia logo

LinkWithin

Related Posts Plugin for WordPress, Blogger...