Showing posts with label clothing. Show all posts

Monday, May 04, 2020

Scrappy Strips Quilt

I once sewed clothing for my kids when they were small. This blog is actually a chronology of all the things I sewed for them, thankfully, because I sure wouldn't remember all the lovely things I made with love for them.

I have been seeing lots of strip quilts, here, here, and here, and I wanted to make a similar one.

Here it is!


Most of the fabrics came from past projects, like this one:


And this ruffled skirt:
scraps from this skirt are in the quilts, this daughter is 16 now!

It's a twin size quilt, perfect for a guest room.

I even used a scrappy binding, just grabbed a bunch of old leftover strips from past projects.

Isn't that blue Hawaiian print scrumptious? My son wore that hat I made for him for years. He gets married this month, that's how long ago this was.


The quilting was sent out to a local company, it's just a bunch geometric squares. I am sure this will be loved for years to come as it took years to curate all these fabrics.

I always embroider the year on my projects


Tuesday, May 21, 2013

Burda #9489

D7K_2242

My girls are getting old enough (12 and 9 yrs) that they want regular skirts—not just pull on elastic-waist ones. Do you know how hard it is to find fitted skirts with zippers for girls? They’re still too small to use women’s patterns so I’m left searching the big girl’s patterns. Trust me, they are few and far between. If I was a pattern drafter, I could make a lot of money by designing patterns for tweens. I hate that word “tween” but it is really is the easiest way to describe this  middle age for girls—too young for teens/women, too big for girls. Thankfully Burda has a tiny handful of patterns for tweens.

burda 9489

Like most Burda patterns, it is well drafted and the directions are easy to follow. I followed the directions for the yellow skirt but didn’t even need them once I made the black polka-dot version. I love that this skirt has a yoke and belt loops. The gathers make it nice and full since the pattern is meant for lightweight fabrics. I used 100% quilting-weight cottons.

D7K_2247

On the above skirt you can see that I eliminated the pocket trim which is purely decorative. The below skirt has a gray linen for the pocket trim. I used stitch #412 on my sewing machine, Bernina 830, to trim the gray linen. I think it looks like flying butterflies. So cute.

D7K_2234D7K_2232

The one thing I need to figure out is why once I install the zipper the yoke left and right do not match up anymore, as seen in the below photo. Drives me crazy.

D7K_2240

I did lengthen the skirts considerably. About 3”. I made both girls a size 12. I would also add that if you make this skirt wrap the yoke around your daughter before you sew it on because it might be too small if your daughter isn’t a skinny little stick. I’m glad I did this because I ended up cutting a wider yoke for the black skirt. My two girls have completely different body types. It was an easy fix to cut a wider yoke—didn’t affect the skirt at all—just gather a little less to accommodate the wider yoke.

All in all I loved this pattern and will use it over and over for the next several years with my girls.

D7K_2245

By the way, the ties are just scarves from my closet—I need to buy them some belts now! And their adorable button-down shirts are from Lands End.

Thursday, September 06, 2012

Burda 7866

Easy pattern. Totally stylish. Made in one hour or less. Does it get better than that? Nope.

stripe tunic (1) copy

There isn’t even a shoulder seam. You sew the sides, finish the neckline, and do some hemming. Done. 

Modifications: Other reviewers said the neckline was too high and was choking them. So I cut it a bit lower—maybe 1 inch lower. As you can see, it’s still pretty high so I’m glad I did. Also, I will say that the neckline is a little too “boatneck” for me. I already had it cut out and knew that by simply turning under the neckline and stitching with clear elastic to stabilize (see this post) that it would be even more off the shoulder. In the black-stripe version I decided to finish it with self-ribbing at the neckline. Love it. I also made the sleeves 3” shorter as it is still a blazing hot 90 degrees here in Utah. I LOOOOVE this stripey fabric, also used here on this skirt.

stripe tunic (3) copy

I made another one the same day in this solid gray cotton lycra knit. It didn’t have the drape as the above rayon knit. It didn’t ‘drape’ very well around the neckline as you can see. It was looking a bit “drabby communist” so I opted to finish the hems in a hot pink stitching and also the neckline in pink ribbing. It’s fine, but the moral of the story is: only make this pattern with extra soft drapey knits. Unless you like the communist look.

gray tunic 1 (4) copy

Oh and obviously I opted to omit the fabric belt called for in the pattern. Not necessary on the striped one as the stripes would just “camoflauge” another striped belt. And on the gray version, I opted to use my pink metallic belt and forgo even more gray.

gray tunic 1 (1) copy

I love the ‘cinched’ waistline this pattern gives around the waist and hips. Very in style right now! I am going to make soooo many more of this shirt. Love it. Has to be in one of my top ten fave patterns. Both fabrics used here are from girlcharlee.com. I’m still on the hunt for the perfect drapey solid knit though. This gray was just too heavy for this project. Any suggestions? I’d love to find Modal or Siltex knit somewhere.

burda 7866

Monday, August 27, 2012

New Look #6470

Argh, I have such mixed feelings about this pattern. On the one hand it, it is very cute and flattering—especially the flutter sleeves. On the other hand, it is has such narrow shoulders that you gotta wear an undershirt—unless you’re gonna wear a strapless bra and don’t mind showing everybody your chest when you even slightly bend over. I wasn’t interested in either so in the heat of August I had to wear another layer of clothing. Oh the blazing inferno.

DSC_0726 copy

This was my first attempt at a cowl neckline. I think that’s the correct term. Maybe I’ll try to alter it for a wider shoulder and higher neckline. Seriously—I measured the finished shoulder and it’s maybe 2”. Grrrrr. I'm not great at altering, especially with a style I’m new at, but we’ll see. Open to any pattern suggestions from my bloggy friends.

newlook 6470

I love this batik-print knit from Girl Charlee. After I made this blouse I quickly logged on and bought more before it would sell out. And it will sell out sadly.

DSC_0731

Thursday, August 16, 2012

Shirred Cap Sleeve T-shirts

DSC_0678 copy

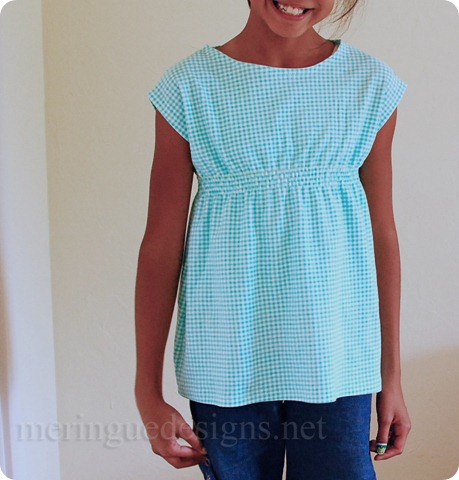
Have you seen the kids clothing over at Tea Clothing.? I purchased many of their t-shirts and dresses recently. And when one of them arrived I knew it would be super easy to knock-off and make loads for the girls. We have this exact blue top, seen below, ain’t it cute? Love their stuff and recommend them whether you sew or not.

tea cap sleeve top 

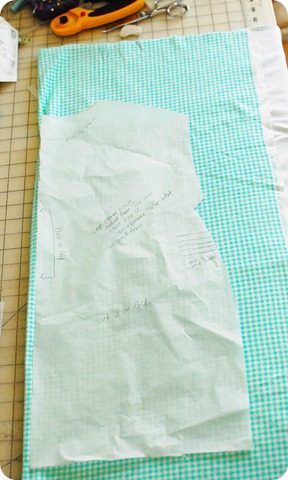
I traced the above  t-shirt, added a seam allowance, and have been making some cute Ts for the girls’ back-to-school wardrobe.
DSC_0680

I think what makes this top is the shirred waist line. Five rows is all you need to give that cinched feminine look. Shirring is really easy. You just need to hand wind elastic onto your bobbin and sew rows across the shirt.  Follow this tutorial over at Ruffles & Stuff.

DSC_0676

And of course, use clear elastic for a simple fold over neckline. Read this post for more about clear elastic.

DSC_0675

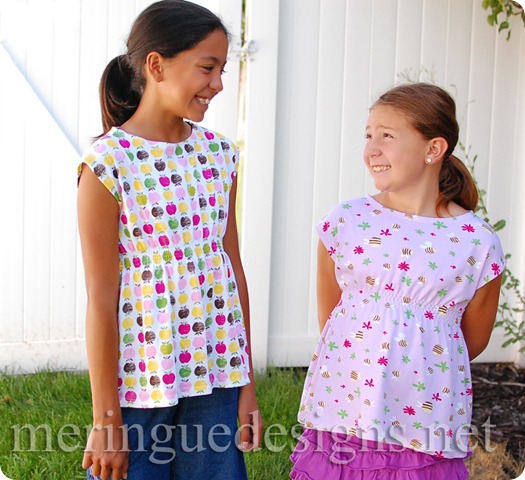
On the above apple shirt I used a lengthened zig-zag for the neckline. On the bumble bee shirt below I used a special stitch for knits on my sewing machine.

DSC_0674

DSC_0673 copy

So here’s how you make the shirt:

Step #1—Cut out a front and back for your shirt using this pattern, on the fold. The pattern I created is for big girls—mine are ages 8 and 12 but it shouldn’t be hard to shrink it down for little ones or trace an existing t-shirt that fits your girl. You’ll need to tape the three pages together on the dotted lines. The pattern on the right is full size and the pattern on the left shows how you’ll need to tape it together. The scanned pattern is off a little, as you can see in this ph0to, but I think you’ll be able to use it just fine by evening out the lines that didn’t scan.  It’s a knit t-shirt after all and not a fitted corset. I’ll teach you how to make a corset in another post. I’m kidding. Never. 

DSC_0681

2—Sew the shirt together at just one of the side seams as seen below. I used my serger but you can also use a zig-zag stitch. I go back and forth between loving the serger and preferring my machine. Doesn’t matter—knits don’t ravel so a serger isn’t necessary. Just nice.

DSC_0682

3—Mark just the top line for shirring using tailors chalk, a tracing wheel and tracing paper, or a washable fabric pen.

DSC_0684

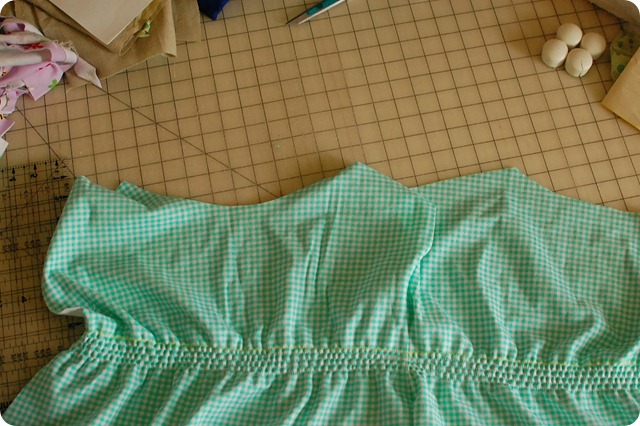
4—Sew five rows of shirring elastic, with elastic thread in the bobbin, using this tutorial over at Ruffles & Stuff.

DSC_0685

5—This is how the shirt will look after you have done the shirring. Cute already!!
DSC_0686 

6—Now you need to reinforce your shoulders on the back piece (or front, doesn’t matter) with interfacing, as explained in this blog post.  Sew your shoulders seams together and then sew the other remaining side of the shirt, as seen below.

DSC_0689 copy

7—Finish the neckline by turning under 3/8” and sewing a zig-zag stitch all the while “sandwiching” clear elastic between the fabric. It was hard to photograph but maybe you can see the elastic below with the arrow pointing to it.

DSC_0693 copy

8—Finish the armholes and the bottom hem. I like to either use heavy duty spray starch to iron the hem in place before sewing or use steam-a-seam, as explained in this great blog post if your fabric is very flimsy, thin, or hard to manage, as when using lycra knits. All done!!!

This is how the neckline and shoulder seam looks from the inside.

DSC_0694

Here’s the bottom hem done with a zig-zag:

DSC_0690

Here it is on my cute daughter:

DSC_0695 copy

Here’s another version in hot pink—lengthened quite a bit to be worn as a dress, with leggings, or jeans.

DSC_0712 copy

DSC_0711 copy 

Fast and easy. I can make the top in about 30 minutes now.  I’m gonna make loads more as the first two months of school are still blazing hot. And once fall comes these will look great with a cardigan.

CLICK HERE FOR PATTERN, FITS GIRLS SIZE10-12

IF YOU LIKE THIS PATTERN, PLEASE CHECK OUT MY WEBSITE AT WWW.MERINGUEDESIGNS.NET WHERE I SELL SEWING PATTERNS AND EMBROIDERY DESIGNS.

Knit fabrics used: apple print and the pink dot print are from Girl Charlee.  Fabric.com for the bumble bee print and the mint gingham.

Happy sewing,

cynthia logo

Friday, July 27, 2012

Cap Sleeve Basic Tee

I own quite a few basic cap sleeve tops from Shade Clothing and Modbe Clothing. What I really wish is that they’d make the basic cap sleeve shirt but with a higher back. The back neckline is just as scooped as the front. I don’t like folks seeing my swimsuit strap tan lines. Plus freckles galore. So a few years ago I decided to trace one of their tops to make my own out of printed fabric. I’ve made a striped one and here’s another one I made this week.

cap sleeve top (5)

Just trace your favorite cap sleeve top and add 1/2” seam allowances all the way around.

cap sleeve green top

Make sure you are using something with lots of lycra if your original shirt is also super duper stretchy. I used this awesome green knit I bought a long while ago on fabric.com I have no idea what ITY means but I love this fabric. Just a yard is needed and at $5 or less what a deal huh?

cap sleeve green top2

It will take you about 30 minutes to sew the top. Here’s how I do it.

Iron scraps of interfacing to one side of your top—doesn’t matter if it’s your front or back piece. This is to stabilize the shoulder seams. (You could use clear elastic—hold your horses—more on that in a second pardner.) In fact, look at the shoulder seams of your store-bought t-shirts and you’ll see they are stabilized with one of these two methods. Nobody wants stretched out shoulders.

cap sleeve green top3

After you iron on the interfacing, you will then sew the front to back at the shoulder seams with a stretchy stitch like a zig-zag or use your serger, every sewer’s best friend.

Then sew the side seams of your shirt.

Now for the neck, you’re going to need some clear elastic. It’s $1-2 bucks. This stuff is mostly used on swimsuits. (You might even see some poking out on the ‘leg holes’ of your swimsuit.) You could bind the neckline. You could make self-ribbing out of the leftover fabric as well, but this is the fast and dirty way. And it looks great.

cap sleeve green top4

For the neckline you are simply going to turn under the neckline your 1/2” seam allowance and “sandwich” in some clear elastic as you zig-zag all the way around the neckline. (I find it ironic that I have access to 1,000 stitches on my Bernina 830 and yet I’m sewing this with a basic zig-zag on my Bernina 131.) I love the vintage look of a basic zig-zag. Don’t stretch your fabric and don’t stretch your elastic.

cap sleeve green top5

Do the same for the ‘sleeve’ and the bottom hem of the shirt—only you don’t need no stinkin’ elastic here.

cap sleeve top (1)

cap sleeve top (7)

cap sleeve top (4)

Not bad for 30 minutes huh ladies? Can’t wait to wear this with my navy blue blazer in the fall.

LinkWithin

Related Posts Plugin for WordPress, Blogger...